Creation of Invoice
You can create and send invoices directly from your ReachOut web application and the mobile app. An invoice itemizes and records details regarding the goods and services you offer the customer, such as the agreed cost, quantity, and taxes. You can create invoices quickly using an invoice template, which includes a predefined set of items or services.
Adding Invoice from the Web
- Go to CRM > Invoices and click the + Invoice button.
- Add customer details.
- Select an existing customer, or
- Choose + Create New Customer to add one. customer details.

- Select an invoice template or source (Work Order, Inspection, Quote, or Other) for the invoice based on which the invoice items have to be displayed.
Note:
- Work Order / Inspection: Use when the job is scheduled or completed.
- Quote: Bill the customer based on a pre-approved estimate.
- Other: For sources like purchase orders or internal references and enter the details in the text box below.
- While selecting Work Order, Inspection or Quote, the estimated items linked to that source will appear in the Estimate Items section. Click the Add All to include all items or Add icon to add them individually.

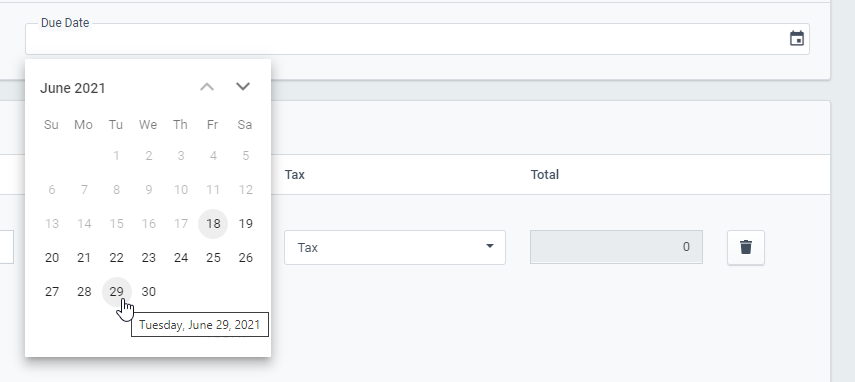
- Set the invoice Due Date. Select a Due Date for your customer to pay the invoice from the calendar.
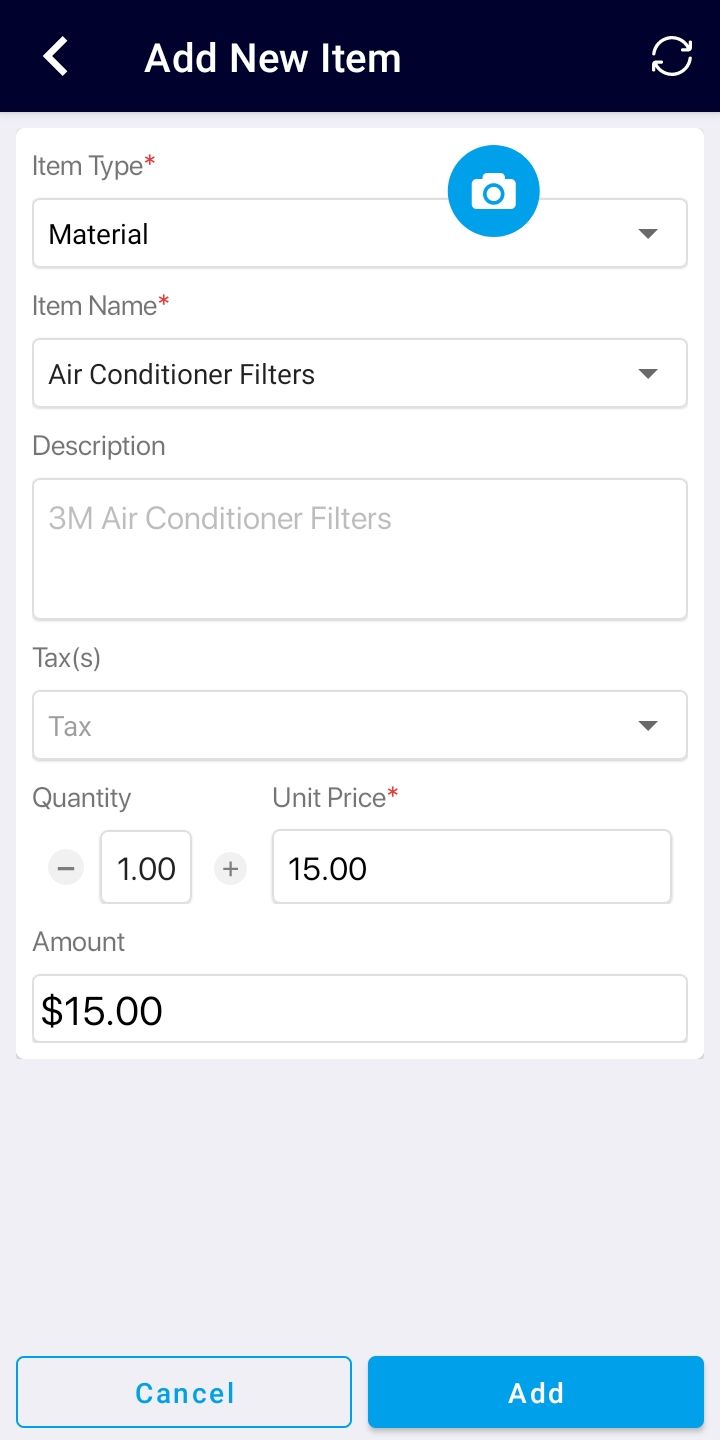
- Add items to the invoice.
- Click the Item Type drop-down and select from the list
- Enter the item details – Name, Description, Quantity, Unit Price, and Tax
- Add more invoice items by clicking on + Add
- Click +Add Tax to attach extra taxes incurred
- Enter any discount by clicking + Add Discount
- Include any notes to appear on the bottom of the invoice using + Add Notes
- Click on the + Attach Files to add files to the invoice.
- Enter the terms and conditions, if any.
- Tick the Allow Partial Payments option if you want to allow partial payments for this invoice.
- Click Save as Draft to save the invoice details in draft mode.
- Select Preview to and verify the invoice before sending it. Once done, click Generate Invoice.
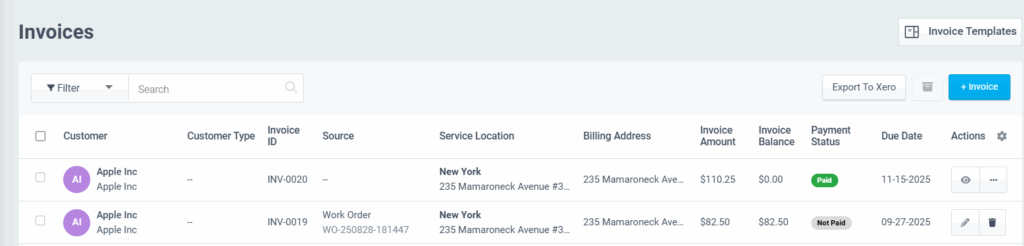
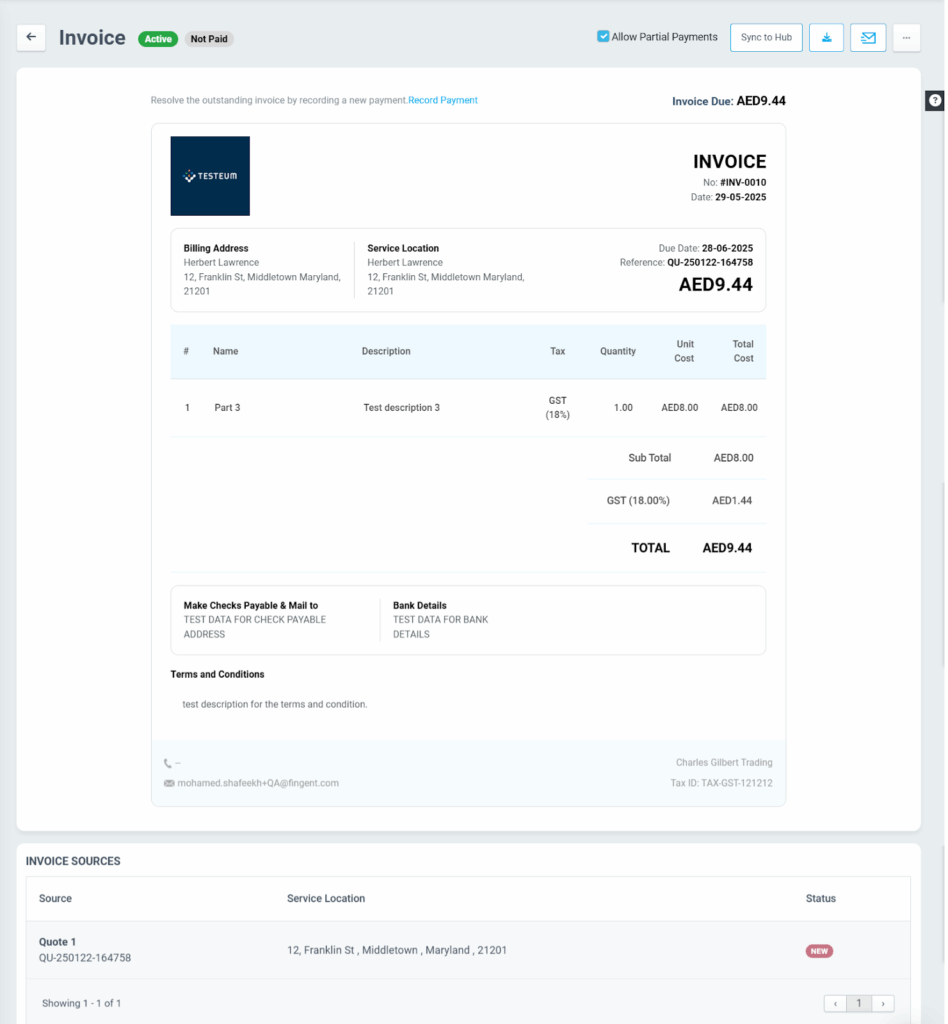
You can view the generated invoice and download it from the invoices home. The invoice source (Quote, Work Order/Inspection, Other) details will be displayed.
Adding Invoice from Mobile
To add an invoice from the mobile app, navigate to the Inspection/Work Order that the field agent is executing from the app.
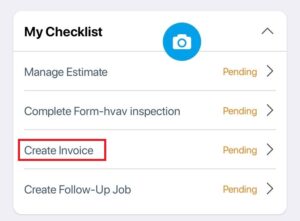
- In Job Details, tap on Create Invoice under the Agent Checklist section.
- Tap the + icon at the top right.
- Add the invoice items and select ADD.
 | 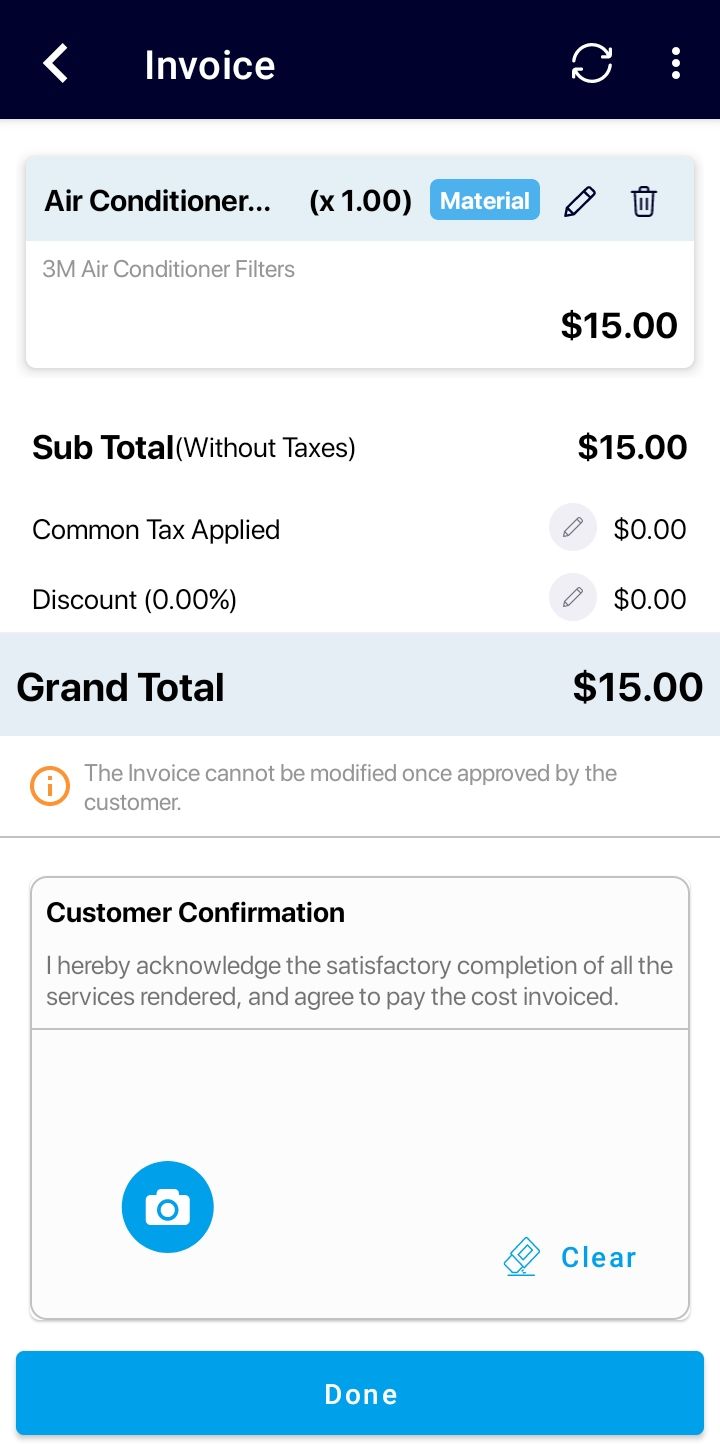 |
If the work order or inspection is set up from the web, where the field agent is being tasked with creating an invoice, the app would require the agent to create an invoice on-site and even get the customer’s signature after approval, if needed.
The Admin manages all subsequent stages of invoice processing.
An invoice created by a field agent is not sent directly to the customer. Instead, the Admin reviews it from the web application and then emails it to the customer.