Managing Parts
You can manage, organize and track the consumption of every newly created and imported item in the inventory.
To manage added parts within the inventory,
- Navigate to Parts Inventory > Parts List
- Organize parts.
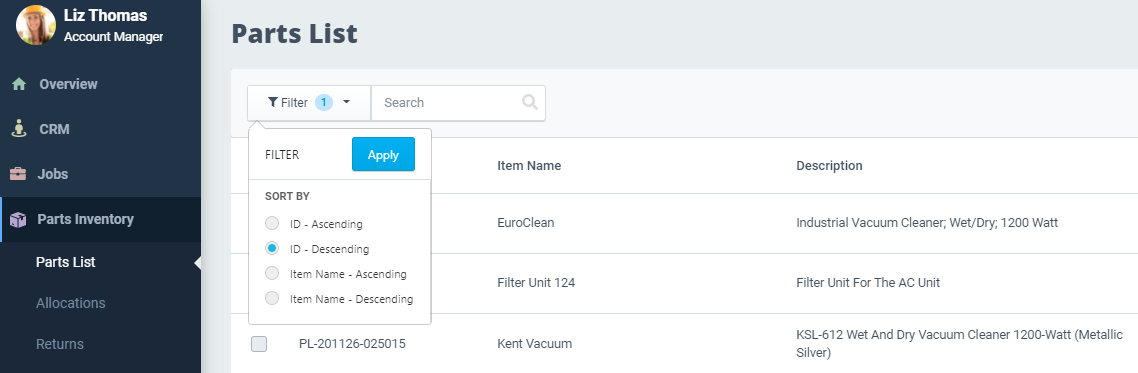
- Use the Filter drop-down to sort listed parts based on ID and Item Name.
- Sort by available options and click Apply
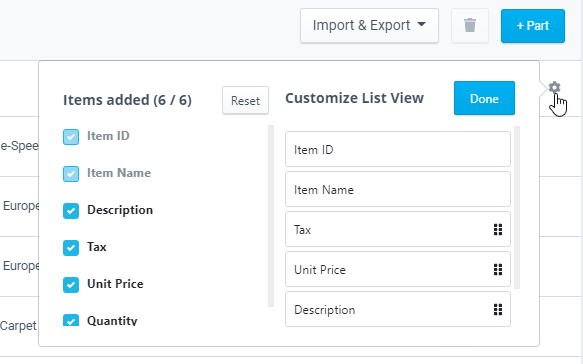
- Customize how different elements are displayed by clicking the gear icon at the top right.
- Mark the checkboxes to show or hide items on the Parts List page.
- Drag and drop the tabs to customize items in the list view.
- Manage parts.
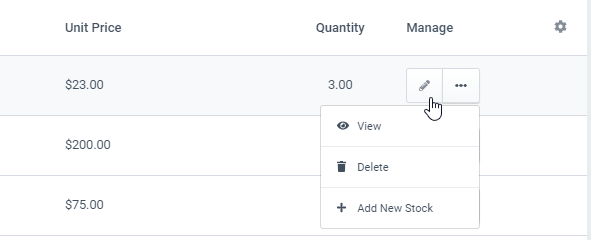
- Edit part details by clicking the pencil icon under the Manage column.
- In the drop-down, click View to reveal the full details of the added item.
- Click Delete to remove a part. (You cannot delete parts once it has been allocated to a field agent)
- Update stock levels by clicking + Add New Stock.
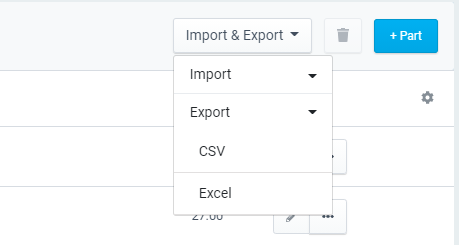
- Export parts.
- Click the Import & Export button at the top right, select Export and choose from a CSV or Excel from the drop-down.
Learn how you can export parts to QuickBooks and Xero.