Creation of Tickets
Once you have made the needed customizations to ticket settings, you can now create a ticket to record any customer inquiries, requests, or information.
To start creating tickets, you can use the Quick Create button on the top navigation bar and click on + Ticket. The other way is by opening Tickets from the CRM module on the left and clicking on + Ticket.

- A ticket when created has the status “new”. The ticket can be put back and forth in any of the statuses that you have created based on your internal processes. The priority can be changed anytime. Know more about customizing ticket statuses and other attributes here.

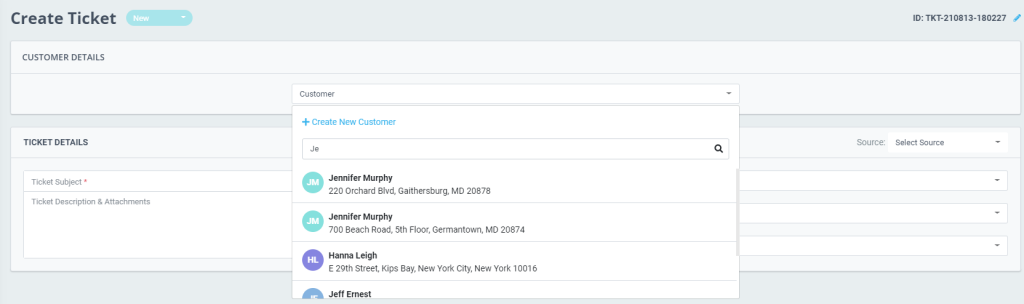
- On the Create Ticket page, start by adding the customer. If you have already added customers, search for the Customer by adding three or more characters of the Customer Name or Customer ID in the search box or else you can directly add a customer by clicking + Create New Customer.
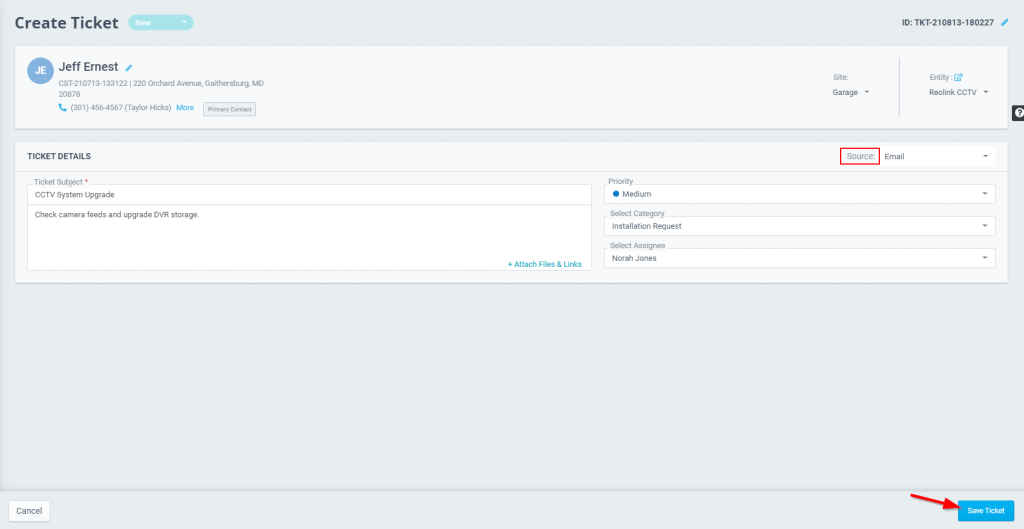
- Next, fill in all the mandatory (*) fields – Ticket Subject, Description, and Attachments (Attach related files & links to this ticket as reference)
- Select a source – Ticket, Work Order, Email, Phone, Other (This will allow you to track where the request has come)
- Set Priority – Low, Medium, High, Critical
- You can also specify categories if required.
- Now, set an assignee for the Ticket and click Save Ticket.
You can view all your created Tickets at the Tickets Listing view.