Registering Assets from Web
In ReachOut, you can add customer assets from the Customer Details or Assets page. Before adding assets, ensure you have set up the asset categories through Settings > Asset Management.
Registering Assets from the Customer Details page
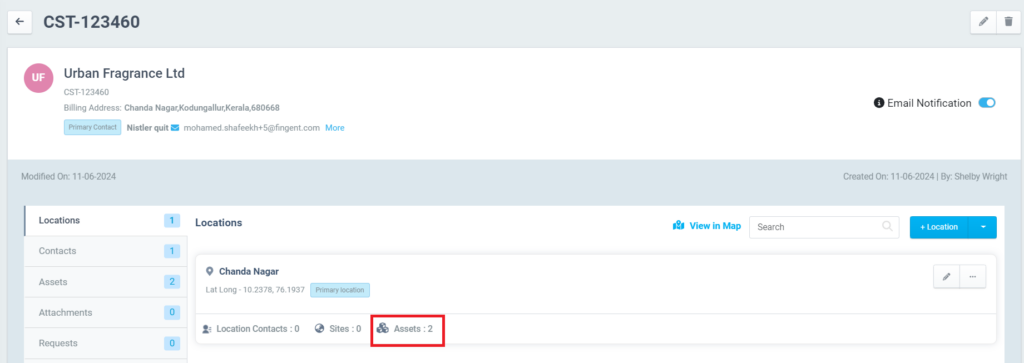
Once you add the customer, location, and site details to the system, you can add the customer assets.
For that,
- Navigate to CRM -> Customers, and click on the customer name

- You will be navigated to the Customer Details page

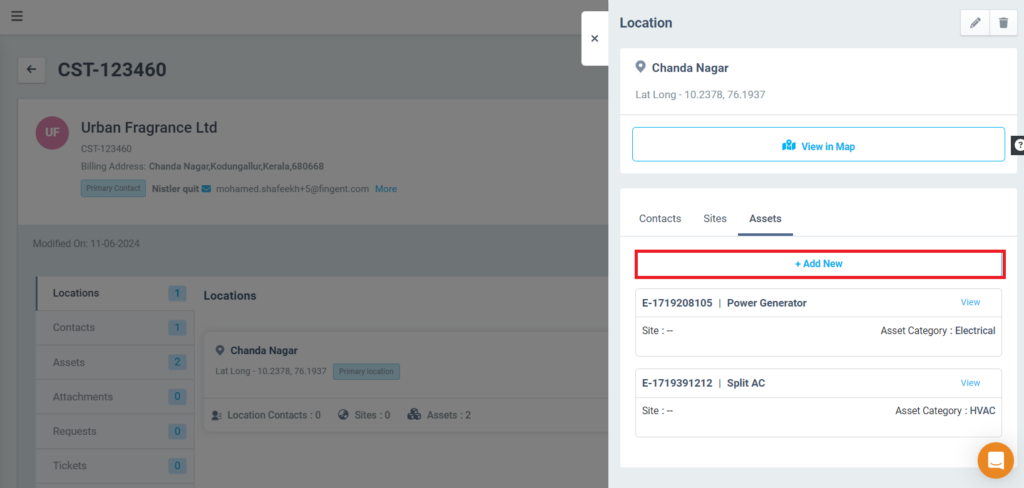
- Click on the Location > Assets tab to register the assets.

- Select customer location and a site, if required

- Provide asset details:
- Enter Asset Name and Description
- Select Asset Category
- The asset attributes of the selected asset category will be displayed as configured through Settings > Asset Management
- Fill in the asset attributes
- Also, the documents & manuals of the selected asset category will be displayed as configured through Settings > Asset Management.
- Upload the documents and manuals
- Upload asset images (maximum 5 images)
- Click Save
- You may also click on the Assets tab and click on the +Asset button to register the assets.

Registering Assets through the Assets page
- Navigate to CRM -> Assets, add customer assets by clicking on + Asset

- The saved assets will be displayed in the CRM -> Assets page. You may edit, view, or archive the asset details.

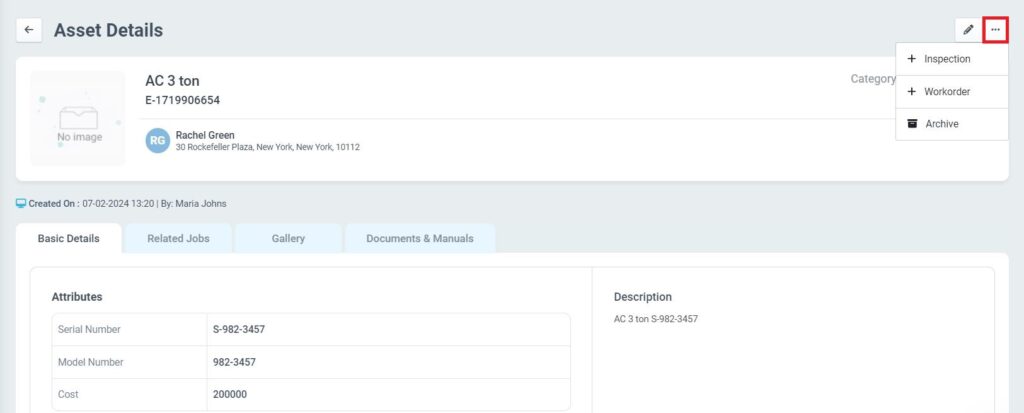
- Once the assets are added to the system, you may click on the ‘Asset ID’ to navigate to the Asset Details page, where you may view:
- The Basic Details, such as the attributes and asset description
- Related Jobs of the asset
- Image Gallery of the asset, where you may upload more images for the asset.
- Documents & Manuals of the asset, where you may upload more documents and manuals for the asset.
- It is possible to create a Work Order/Inspection for this asset by clicking the three dots button.

The asset details are accessible from anywhere – Customers, Assets, or Work Order Creation/Inspection Creation pages.