Maintaining Customer Assets
The Admins/AMs can create and schedule Work Orders/Inspections against an asset.
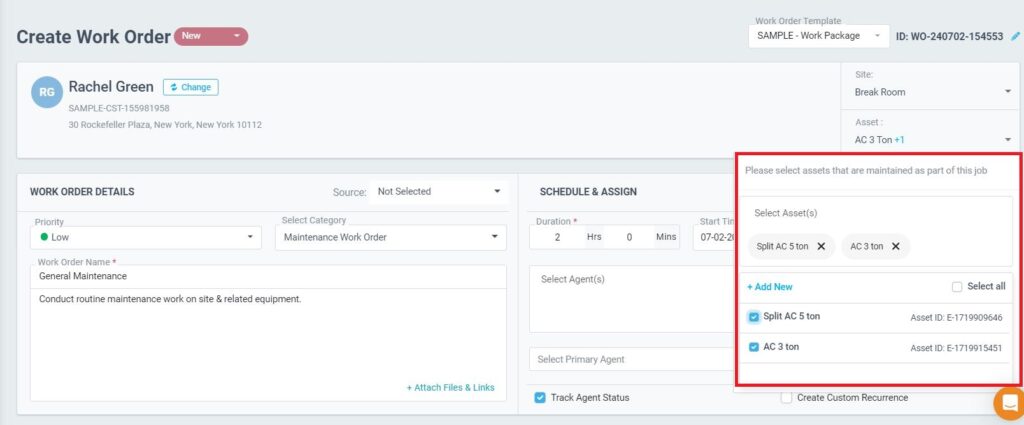
- While creating a Work Order for the asset
- Choose the asset after choosing the customer, location, and site if applicable.
- It is possible to select more than one asset.
- Also, you may create a new asset by clicking on the +Add New button.
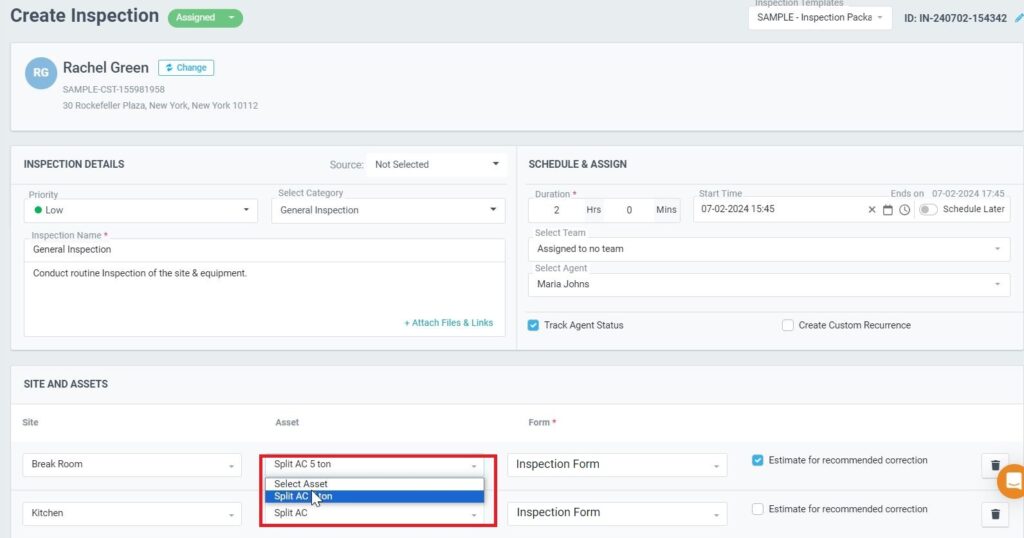
- While creating an Inspection for the asset
- Enter the Inspection details
- Select the site, and the assets created for this site will be displayed.
- Also, the inspection forms set for this asset category will be auto-populated.
- On the ReachOut Mobile Application, the field agents can view the assets linked to the job as Linked Assets in the Job Overview section.
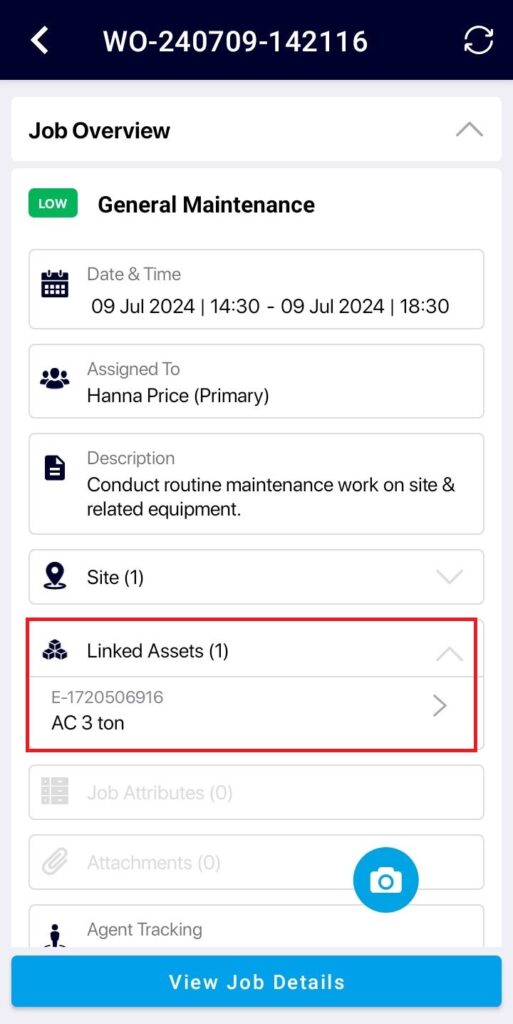
- Tap on the asset name to view the asset details.
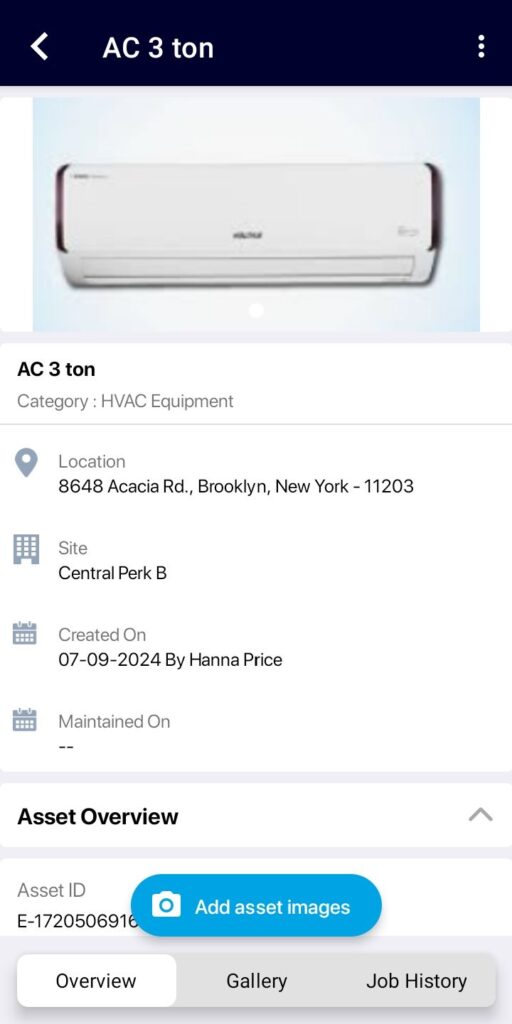
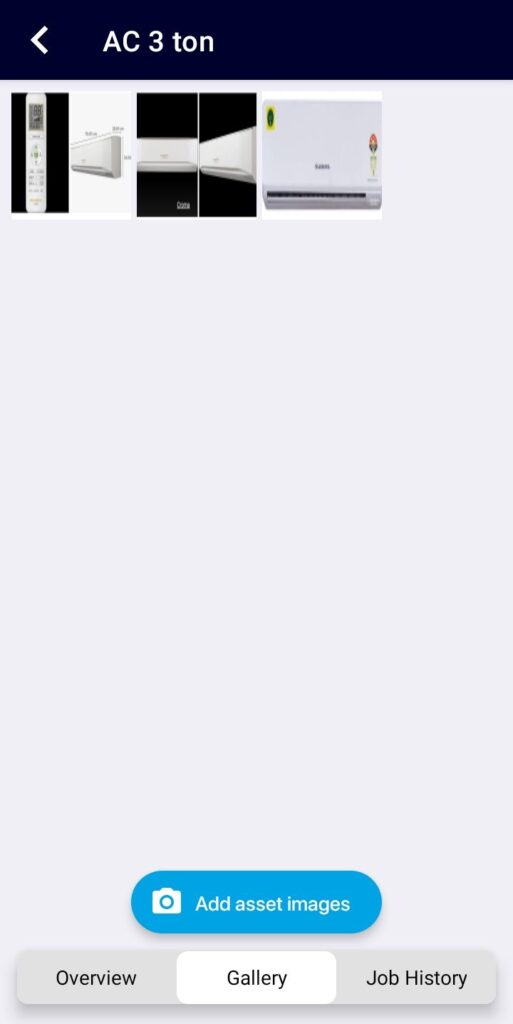
- You can view the basic details, galley, and job history of the asset. All the asset images captured will be added to the Gallery. The Job History gives a list of all the completed jobs for this asset.
- Tap the Add asset images button to add an image for the asset.
- Select the images from your job gallery/phone gallery.
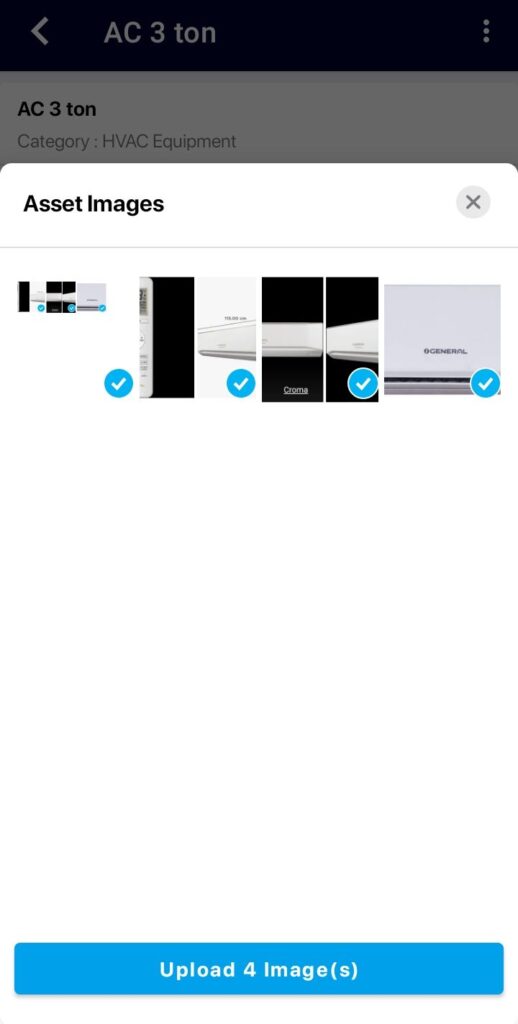
- Tap on the Upload Image(s) button to upload the images to the asset.
- You may view the images uploaded in the Gallery tab.
- On the web side, Admins can view the assets on the Job details page. The newly registered assets by the field agents will be indicated with an icon.

- Click on the View Details button to view the basic details, related jobs, image gallery, documents & manuals of this asset. You may edit the asset details, if required.
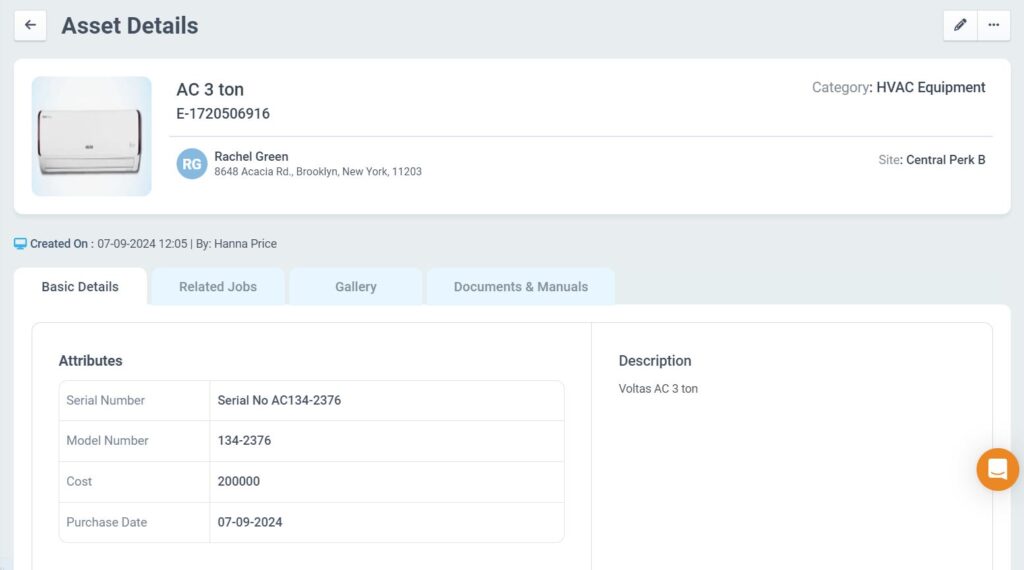
- Click on the Related Jobs tab to view the details.

- The Gallery tab displays the images added through the ReachOut Mobile App and from the Web App.

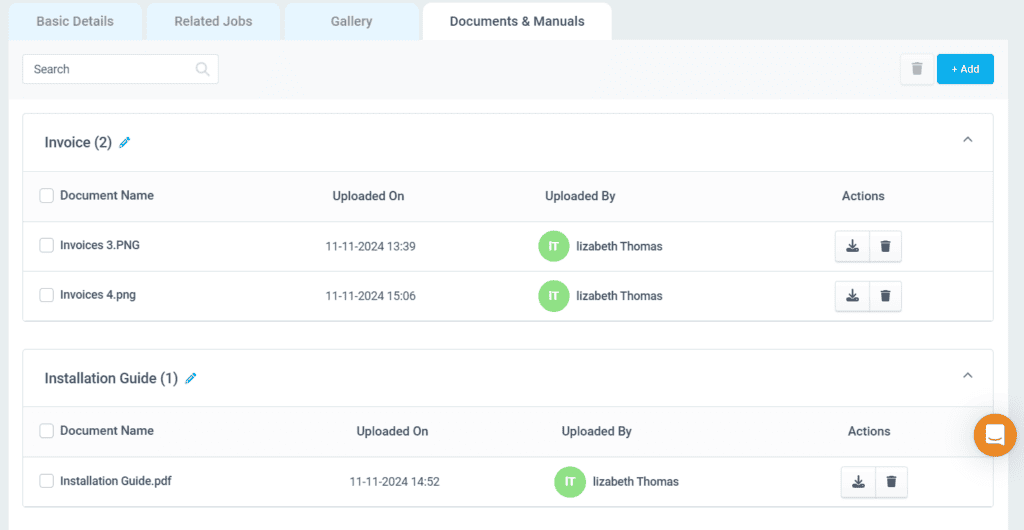
- You may also view the documents linked to the asset in the Documents & Manuals tab. Click on the +Add button to add a new document for this asset.
Registering and managing assets is an effortless task in ReachOut. For any queries, email us at [email protected].