Inventory Configuration
ReachOut’s built-in inventory management feature lets you organize, import, and manage parts and stock used by your field agents to complete their jobs. You can oversee parts owned, add and update stocks, allocate parts, and track usage to maintain ample inventory levels.
Before configuring the inventory, you should first define numerous categories to classify added items. Doing so helps better organize your inventory to quickly access stock details.
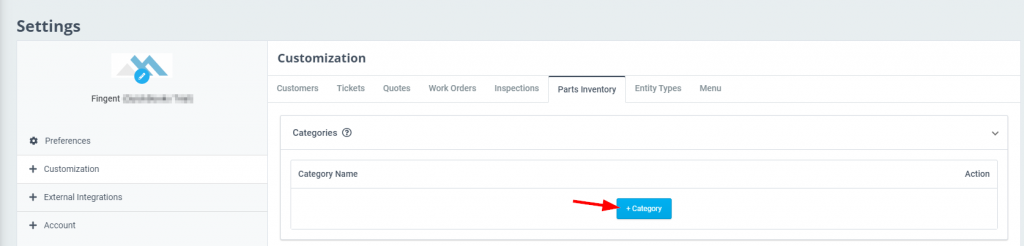
Adding a category
- Navigate to Settings > Customization
- Open Parts Inventory and under Categories, click + Category
- Enter a category name and click the diskette icon to add the category to the list. You can now access these added categories inside the Parts Inventory module.

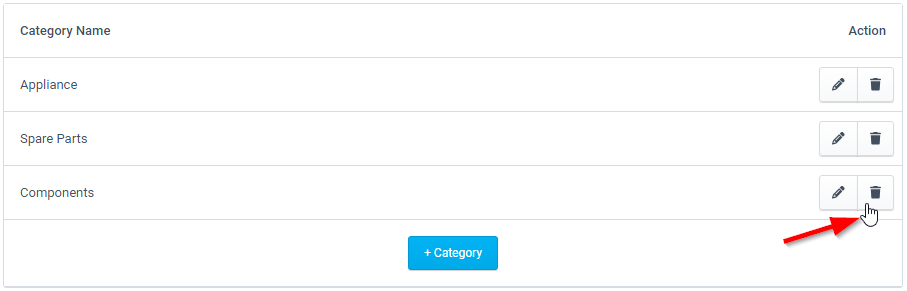
Edit a category
- Click on the pencil icon under the Action column against the existing category.
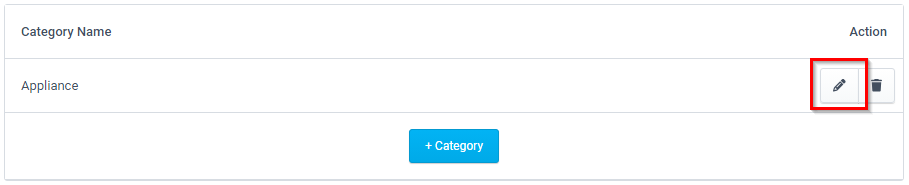
- Make the required changes and click the diskette icon to save.

Delete a category
- Click on the trash can icon against an existing category that you want to remove.