Inspection Creation
First of all, before creating an Inspection, you will need to be logged in as an Administrator. You should have already configured ReachOut with:
A Form with audit questions for the Inspection. You cannot have an Inspection without at least one Form. Learn more.
Custom Status & Categories – You should define the custom status labels and categories to classify and track the life cycle of created inspections. Know more.
Asset – the thing you want to inspect – is optional. Having one associated with an Inspection can facilitate reporting. Learn more.
There are three ways to initiate a new Inspection in ReachOut.
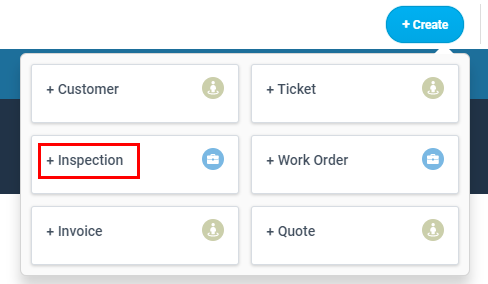
- Using the Quick Create option at the top right of the interface. See the screenshot below.
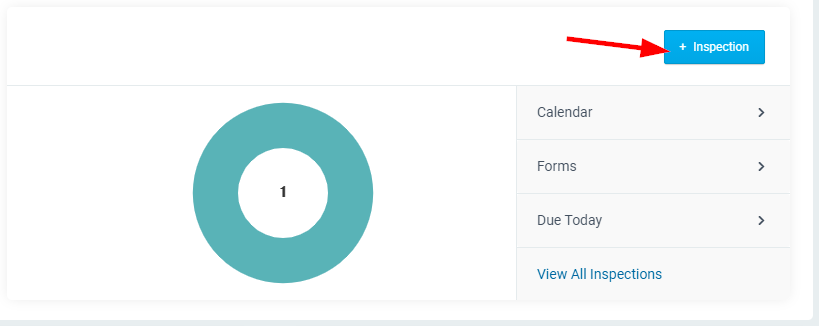
- You can add it from the Overview (Start page).
- The other way to create an Inspection is by navigating to Jobs > All Jobs > Inspections > + Inspection.

Creating an Inspection
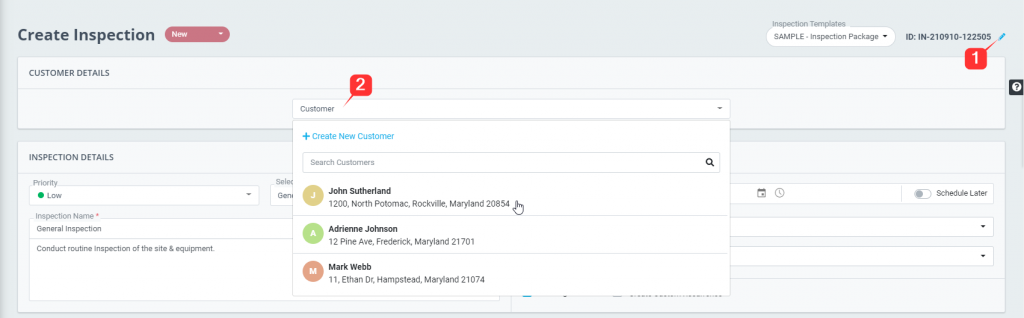
- Inspection ID – the system generates a unique ID automatically, but you can change it to use your own by clicking the pencil icon.
- Start by selecting a Customer from the drop-down. Search for an already-entered Customer by entering the Customer Name or ID in the search box or add a new Customer using the + Create New Customer button.
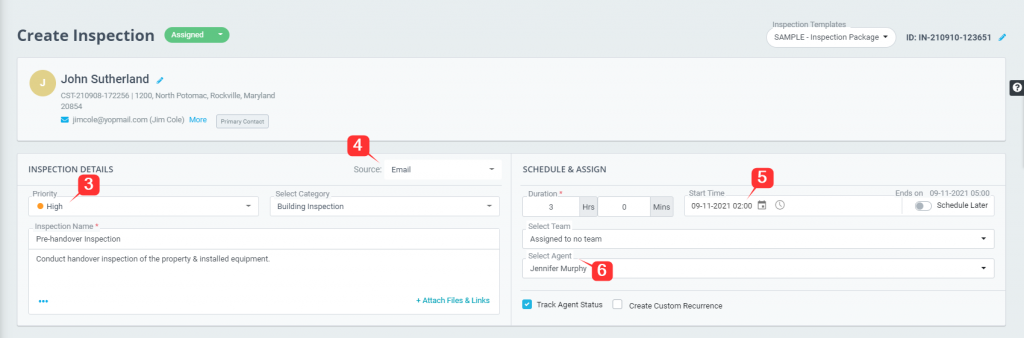
Fill in all the mandatory (*) fields – Inspection Name and Duration. The details you provide will be sent to the Field Agent.
- Set Priority – Low, Medium, High, Critical
- Select Source – Email, Phone, Ticket, Inspection, Work Order, Other (This will allow you to track from where the request has come).
- Set the Start Date and Time to define the span of the entire inspection. Enable Schedule Later, if you want to postpone the scheduling.
- Designate field agents by clicking on the Select Agent(s) field and choose from the list.
7. Check off Track Agent Status to track the time your field agents spend on the job.
8. Mark Create Custom Recurrence, to create a recurring inspection that repeats at a given interval.
- Under Sites and Assets.
- Specify a Site and Asset that are part of the inspection.
- Select a Form for data gathering.
- Click + Add More to include additional sites and assets.
- Enable Estimate for Recommended Correction, if needed. This allows the agent to give a rough estimate of the cost which would be required to resolve the issue(s) found while performing an inspection. This correction cost provided by the agent can then be viewed/edited by the admin. Also, the admin can provide Additional Correction Costs.

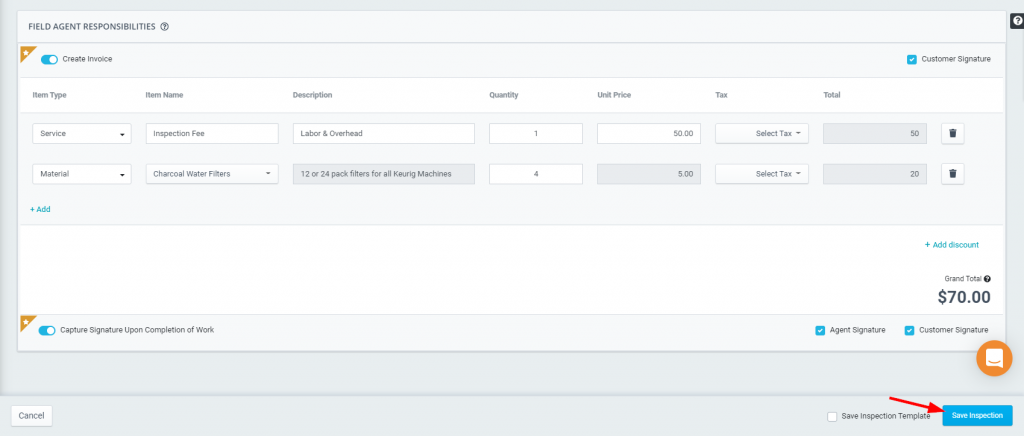
- Next, under Field Agent Responsibilities, mark action items to be assigned to your field agents by toggling the button next to the associated item. Clicking on the star next to the action item turns it into a mandatory action to be completed by the field agent.
- Once done, mark the checkbox for Save Inspection Template, if you wish to bundle and reuse the completion sets and forms for another scheduled inspection. Know how to set up an inspection template here.
- Click Save Inspection.
ReachOut will not let you save the Inspection until you have filled out all mandatory fields. You can view all created inspections at Inspections Home.