Managing and Completing Jobs
Field agents can view and manage assigned jobs using the mobile app. This enables them to gather job details, refer to step-by-step instructions, and complete their assignments on time.
So, here we’ll walk through how to manage and execute jobs using the app.
Accessing Jobs
There are two ways by which field agents can access their assigned jobs.
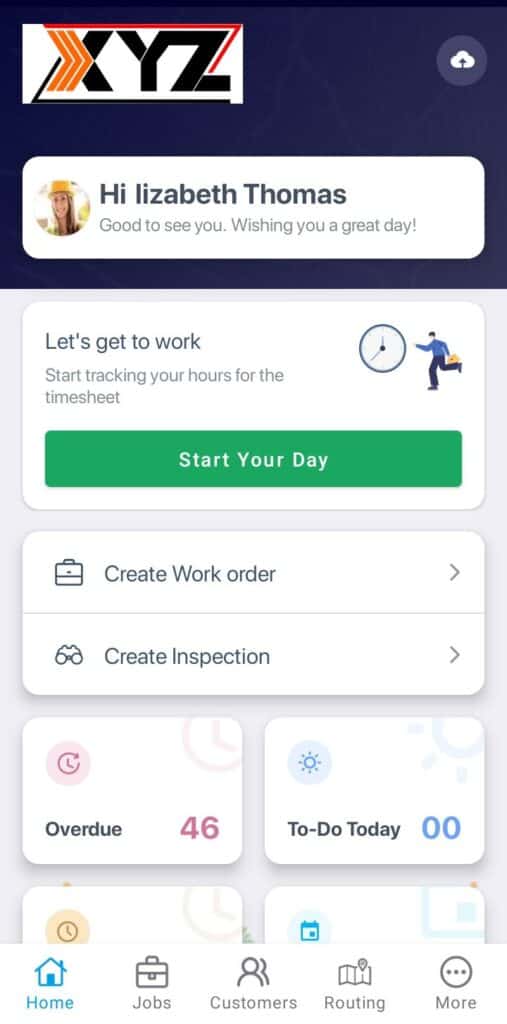
You may tap on Start My Day to mark the attendance for the day and start the assigned jobs for today.
- Tap on To-do Today to view the jobs assigned to do today.
- Tap on the Jobs option in the menu bar to open My Jobs. Find the job from the list and tap to open it. If newly assigned jobs are not visible, tap the Refresh button in the top right corner.
This will reveal further details specific to the job that should be reviewed before proceeding to the next step, which is executing the tasks.

Job Overview
On the Job Overview screen, field agents can view job details such as priority, source, date and time, description, and other agents assigned to the job. The customer’s exact location will be pinned on the map.
- Field agents can also access:
- Location Contacts
- Site Information
- Assets
- Attributes
- Attachments
- Tap the icon next to the Customer Name to view location contact details.
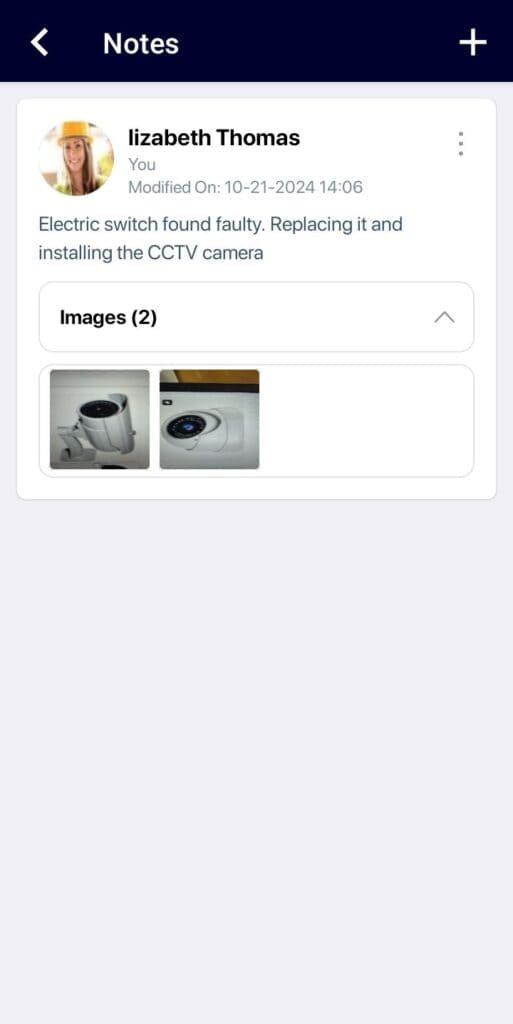
- Administrators can add notes for the field agents, which are visible under the Notes section.
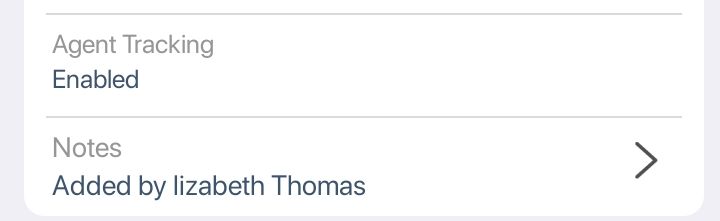
- The field agents can tap on the Notes section to view them.

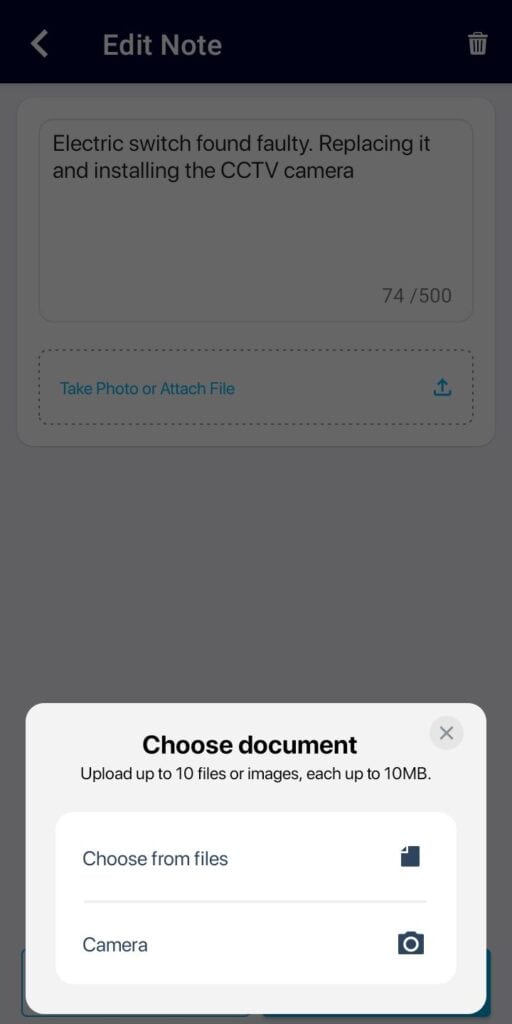
- Tap on the ‘+’ button to add a note. The notes can be added at any time during the job.
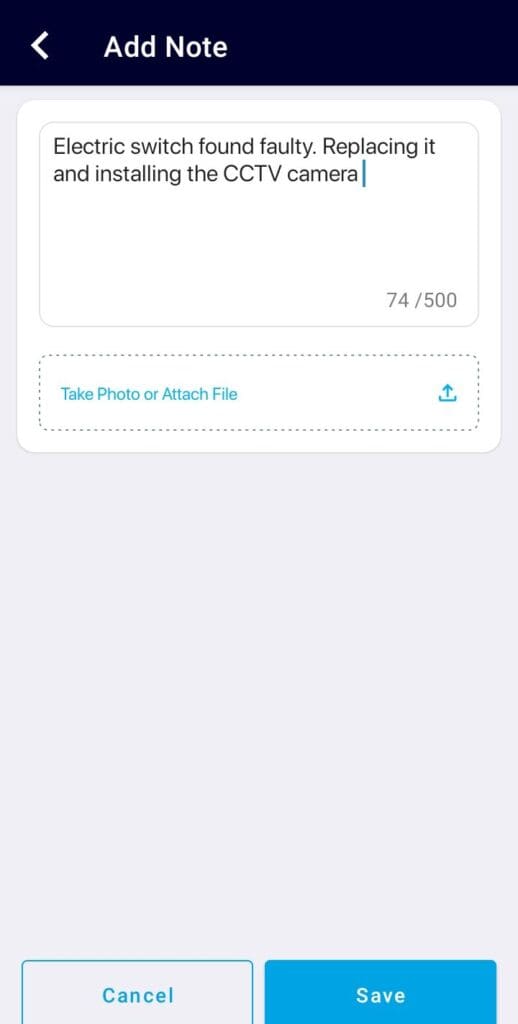
- Agents can capture images using the camera option or attach files from their device.
- You may add up to 10 attachments, with a maximum size of 10 MB each note.
Under the Customer Overview, field agents can:
- Tap on the customer’s name to get complete details of the customer. Here, toggle between Details, Assets, and Job History to view the attributes linked to that particular customer, contact details, assets linked to the customer, and information regarding any previous jobs.
Starting the Job
To begin, tap Download Job.
- Select Mark En-route and confirm Yes to indicate that the field agent is on his way to the customer location.
- Tap Start Job to check in at the customer site.
Note:
- A warning message appears if the field agent is outside the set location radius (if geolocation tracking is enabled through Settings). Agents can proceed by tapping Get Help and selecting a reason.
- Additionally, a checkout alert will be triggered if the field agent has moved outside the geofence radius, where he may dismiss or check out from the job.
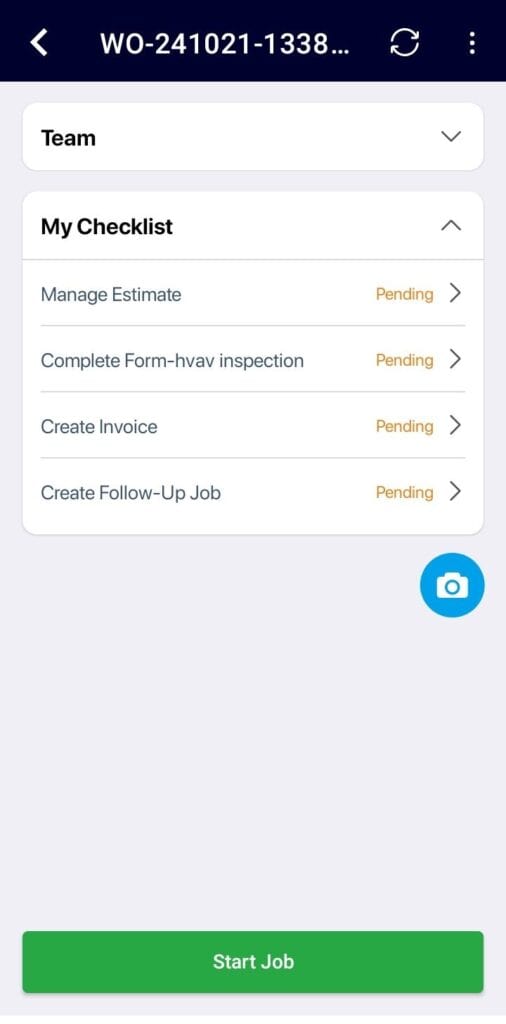
If you are the Primary Agent, you can view the status of all agents assigned to the job.
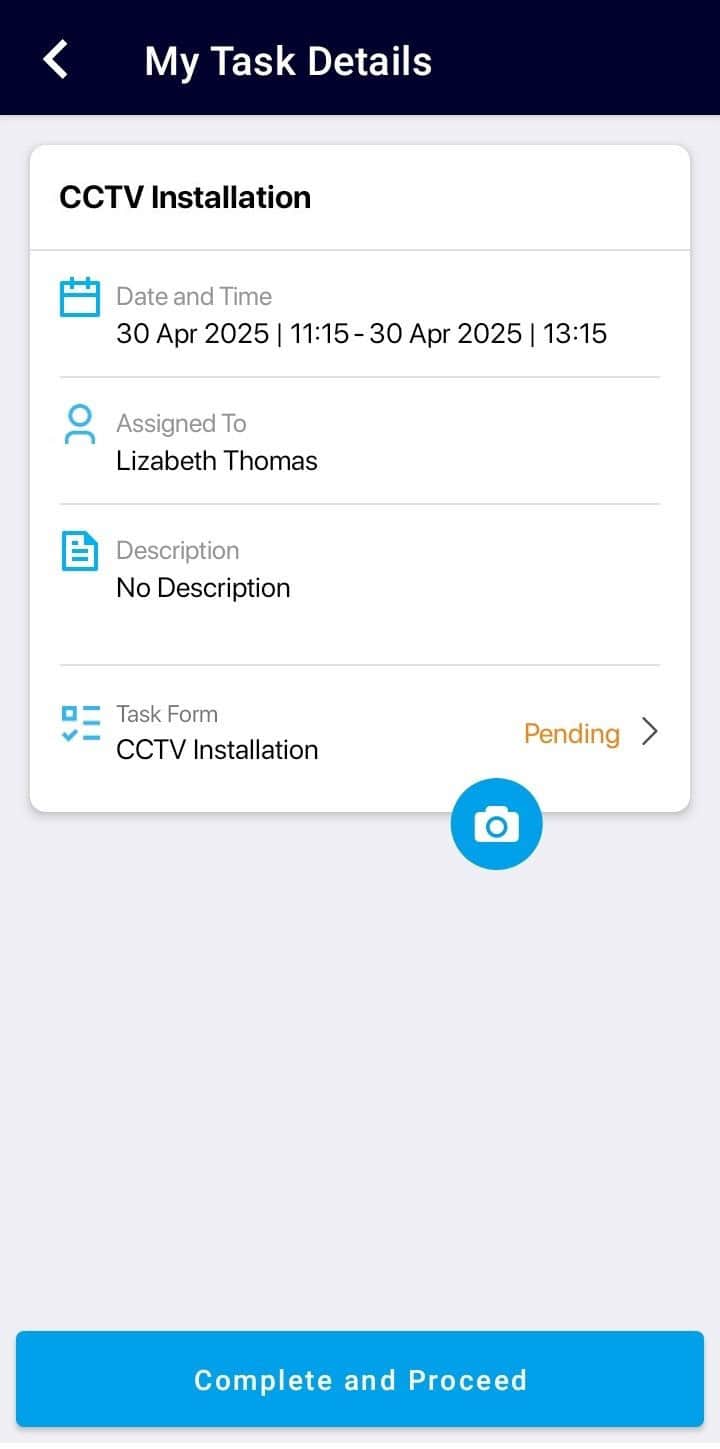
- Under Tasks, select your assigned task to view its details.
- Toggle the Show All Tasks slider to see tasks assigned to other agents.
Capture images using the floating camera icon at the bottom right. You can:
- Use tags to mark the images as and when required while performing the tasks.
- Add comments and annotations to captured images.
- View these images in the Jobs Gallery section of the Job Details page.
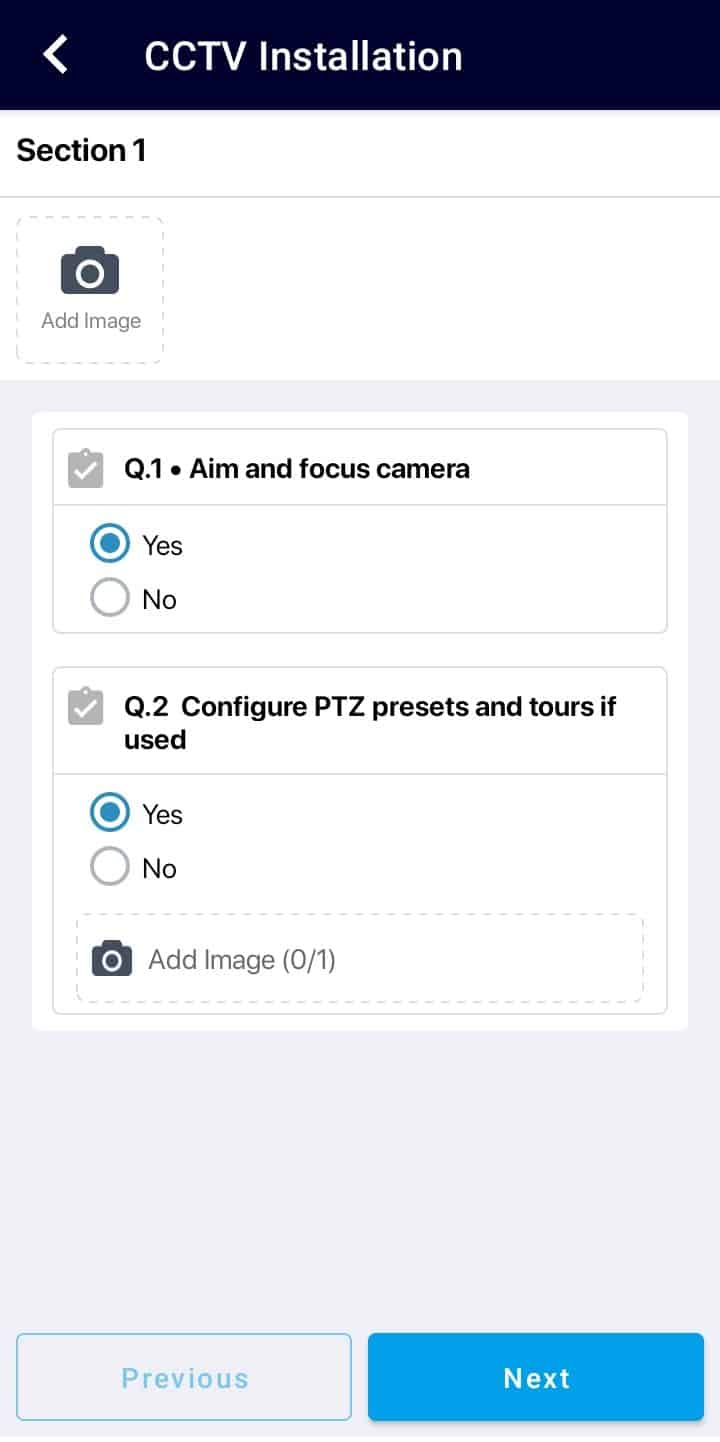
- Perform the necessary steps according to the instructions. Fill out any attached forms and upload photos from the site if required. Use the Take a break button in the Home page to update your status (e.g., when taking a break).
- Once your task is completed, tap Mark As Completed.
 |  |
Completing the Jobs
Next, complete all checklists allocated as part of the job:

- Tap the arrow next to ‘Checked In’ to view agent logs.
- Open each checklist item (Estimate, Form, Invoice, Follow-up Jobs, Customer Signature, etc.) and fill in the required information.
- The field agents can collect payments from their customers online.
- If certain fields are mandatory, the app will prompt you to complete them before submitting the work order.
If you need a break, tap Pause; your work hours will stop being tracked.

To resume the job, tap the Resume button, and you will be checked in again.
Once all tasks are completed:
- Tap Check Out. A confirmation pop-up will appear; tap Proceed to continue.
- Tap Submit Job to initiate data submission in the background.
The job details will be uploaded to the Web. Administrators and supervisors will be immediately notified of the completed job, allowing them to proceed with actions like reviewing raised invoices and collecting payments.
You can review the ongoing job uploads by tapping the Cloud icon at the top right of the home screen.
The ReachOut mobile app empowers field agents to manage and complete their jobs efficiently and accurately. By following the structured workflow, agents can ensure timely updates, maintain service quality, and streamline communication with the back office. Effective use of the app enhances productivity, improves customer satisfaction, and supports seamless job execution from start to finish.