Job Creation on Mobile
Now, you can create Jobs (Work Orders or Inspections) in the ReachOut Mobile App.
The job Creation feature lets you quickly create a Job using a predefined Job Template set up by the account admin.
To start,
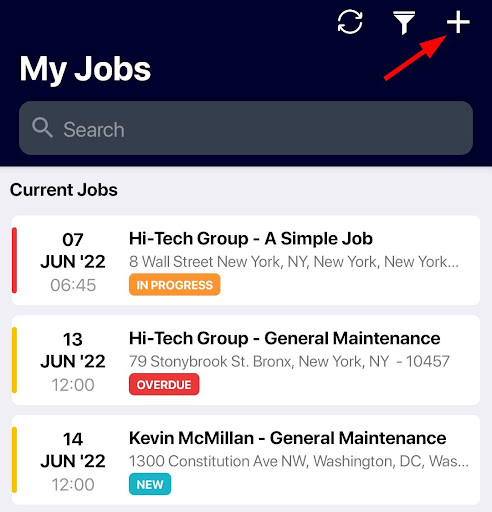
- Go to Jobs and click on the + icon at the top right of the interface.
- Select the Job Type from the list – Work Order or Inspection.
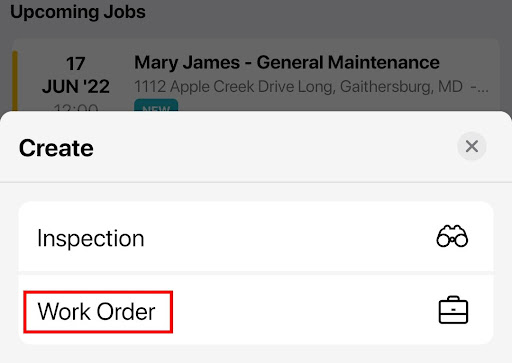
Please note – For Job Creation, there must be a Job Template pre-defined within the Web Application. Learn more about setting up Job Templates here.
Now let’s continue with the Job Creation.
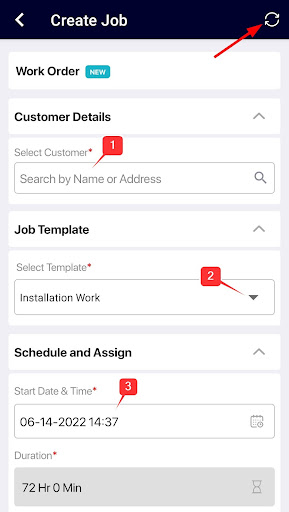
Once the Job Type is selected, fill out the mandatory fields* displayed on the Create Job screen.
Use the refresh button at the top to fetch the latest Customer and Template details.
- Select the Customer by entering the name or address.
- Select a Job Template. (A default template set in the web app will auto-populate here. Select from the available templates).
- Start Date & Time will auto-populate with the current date & time. You may change this to a future date/time as desired. Job Duration will auto-populate from the default value set in the web app.
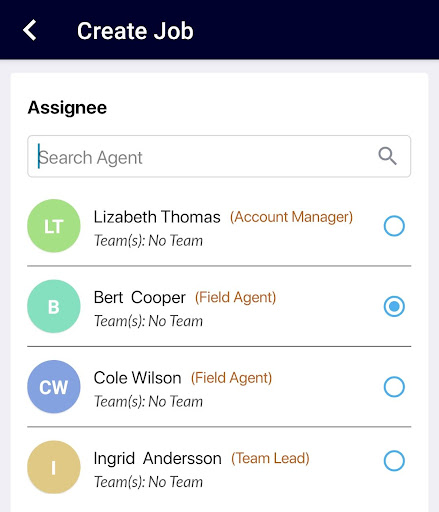
- Assignee will be auto-populated with the name of the person creating the Job. If you’re an Admin or Team Lead, you can assign the Job to another assignee using the edit option (the pencil icon).
- Once the Assignee is selected, click on the Next button.
 |
 |
- Click on the expand icon to view the Primary Contact details.
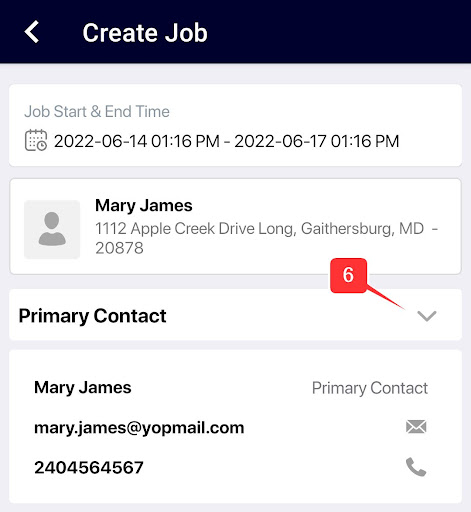
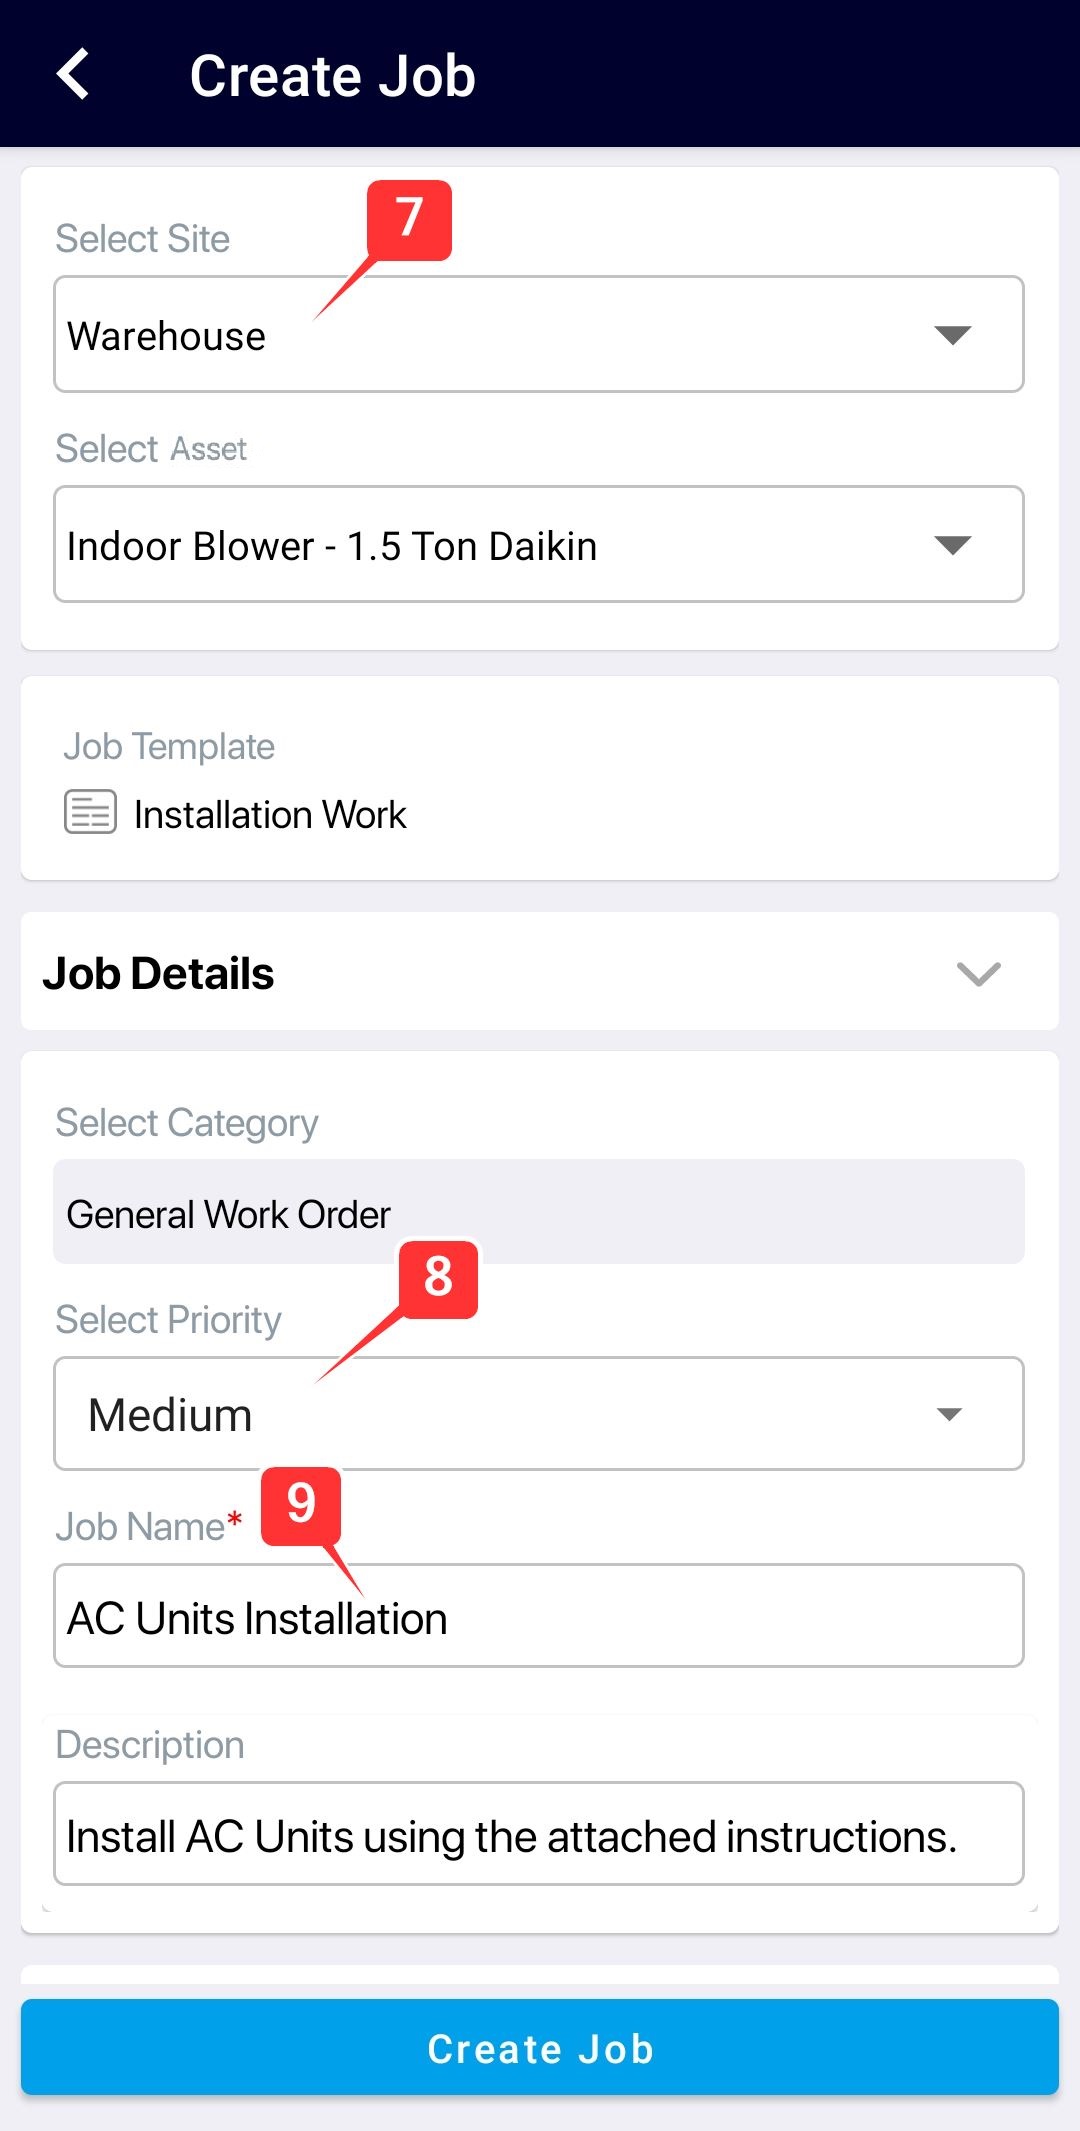
- Next, select a Site from the drop-down menu. The Asset linked to the Site will prepopulate.
Under Job Details, the Category will auto-populate from the Job Template.
- The Priority for the Job will be auto-populated as “Low”. However, you may change this to another option.
- Job Name and Description will auto-populate from the Job Template selected.
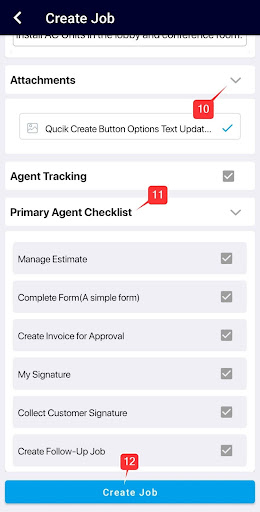
- Click on the expand icon to view the Attachments.
- Finally, the Primary Agent Checklist displays the list of auto-populated Job responsibilities to be completed by the assignee on the Job. (The checklist will display only those items from the Job Template).
- Review the details & click on Create Job.
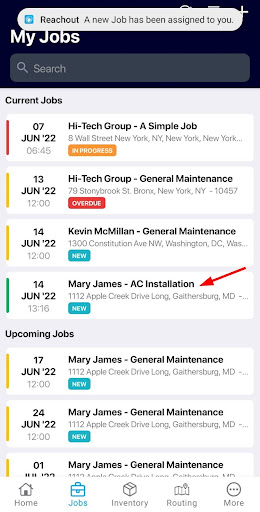
That’s it. The newly created job will be displayed on the Jobs Listing screen. A push notification advising of the new Job will be sent to the assignee.
See how you can manage newly created jobs in the mobile app here.