Creating Forms
A form is a template of questions that can be reused. In ReachOut, you can create standard forms laid with different question types. An instance of the form can be linked to any work order or inspection request. The in-built form builder makes it easy to create brand new forms. Instances of forms simplify data gathering by users.
To start creating forms,
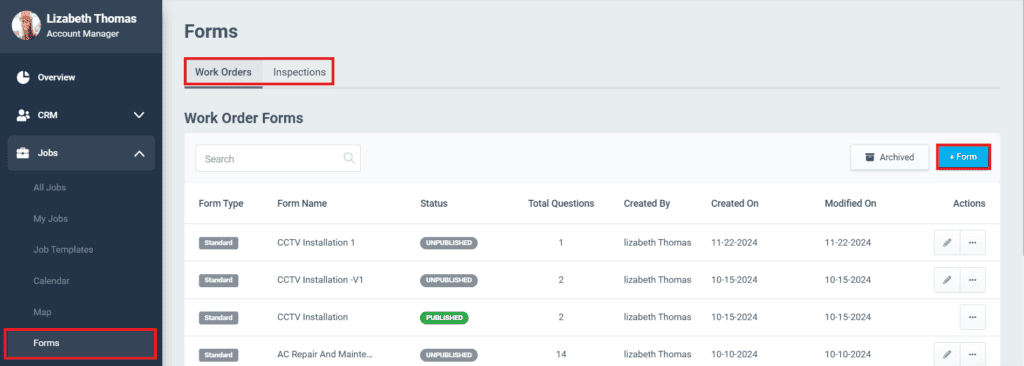
- Navigate to Jobs > Forms > Work Orders/Inspections > + Form.
- Select the Create from scratch to add your own template.
- Give a title for the form in the text box below. Click Start.
(You also can also edit any existing form for reuse by selecting Copy & edit an existing form)

- This opens the form builder with a new section. You can change the default name of the section by clicking on the edit icon.
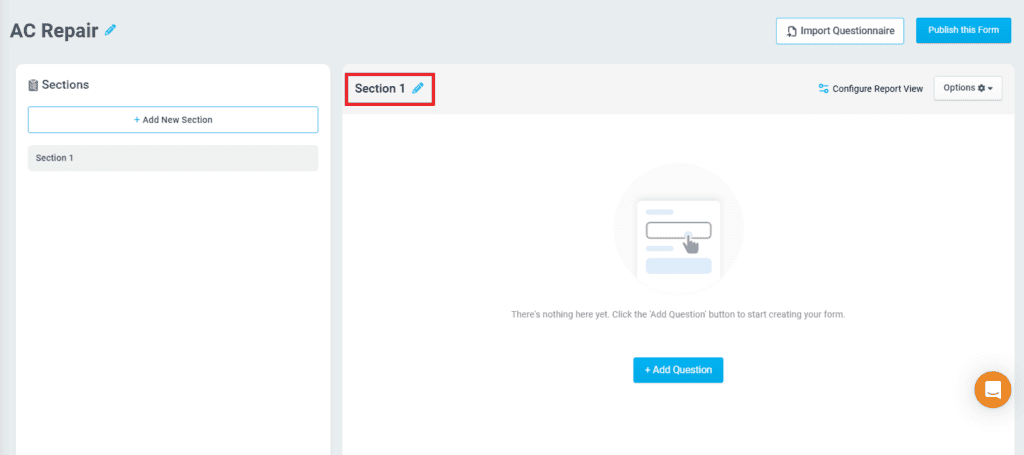
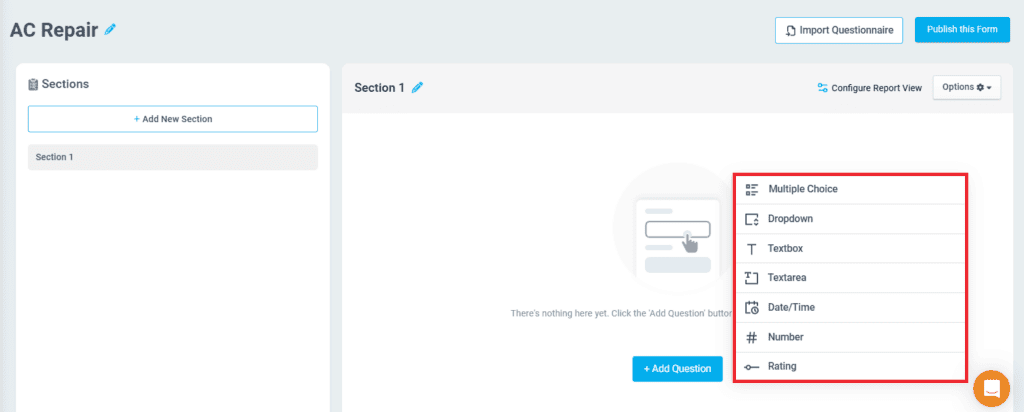
- Click on +Add Question button and select the desired question type to create a new question.
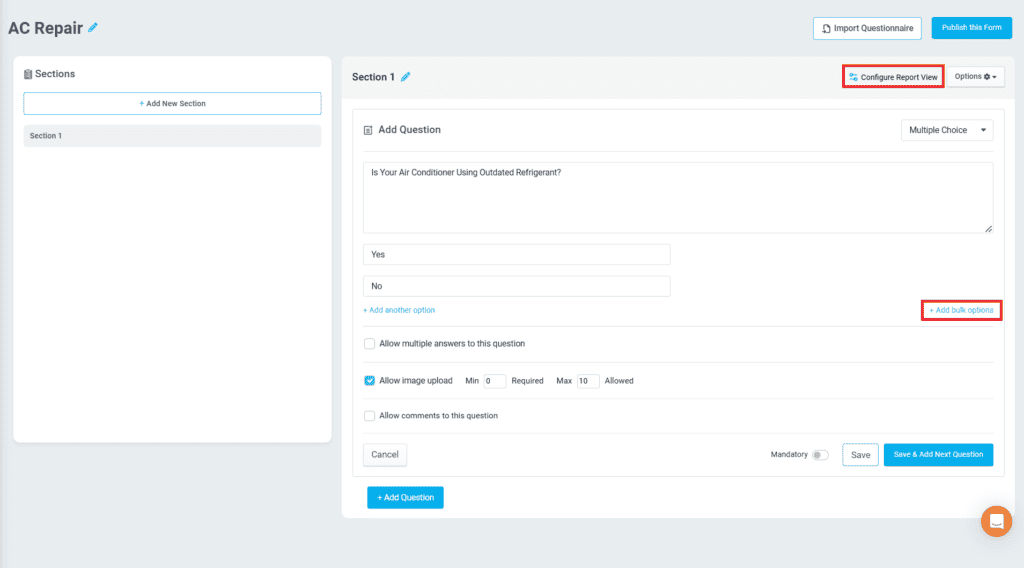
- Enter the question and provide the options(based on the question type). For instance, if you select Multiple Choice as the question type, the layout contains a Question box to address any standard procedure involved and two Options fields beneath where you can list out the answers. Click + Add another option to include additional option fields for the question. Click + Add bulk options to enter the options line by line in bulk.
- Specify if you should make the questions mandatory, allow comments, multiple answers to the question (only for multiple-choice questions), or allow image upload by marking the checkboxes for the same.
- If the image upload is mandatory for a question, you may configure the minimum count for the question. Additionally, you may set the maximum number of images allowed for the question.
- Click on Configure Report View option and toggle the option to ensure that the sections are started on a new page in the job report.
- Click Save. If you wish to include multiple questions in one section, click Save & Add Next Question.
- You can also import and attach any questionnaires along with the form. For this, click on the Import Questionnaire button at the top right. Upload the questionnaire from your system and select Import. There is also an option to download a sample questionnaire, where you can add data or create a new one in the same format to import.

- You may click on the Preview button to have a form preview or report view of the form.
- Once the form questions are built, click on Publish this Form.
Published forms can be found in the Forms section of the Jobs module. You create instances of a published form when you select a form during the job creation process.
Adding Logic for a question
Logic is a condition applicable for a question. This is applicable only for multiple-choice and drop-down questions only.
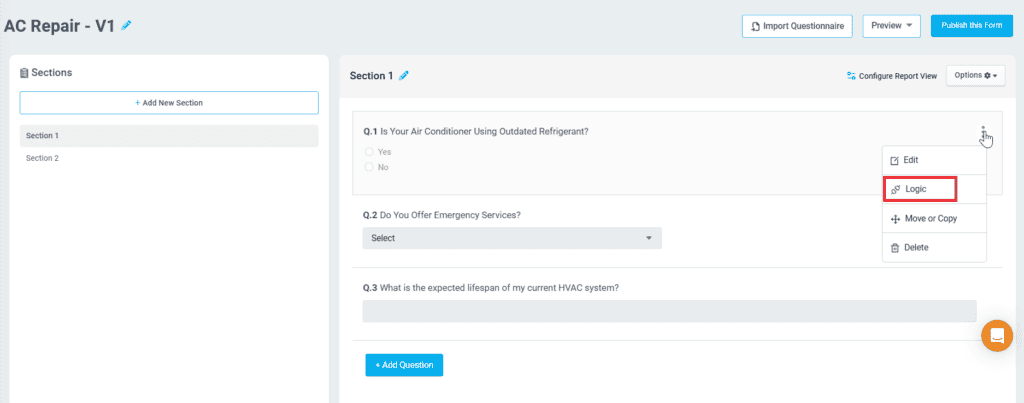
- Click on the three dots adjacent to the multiple-choice question and select the Logic option.
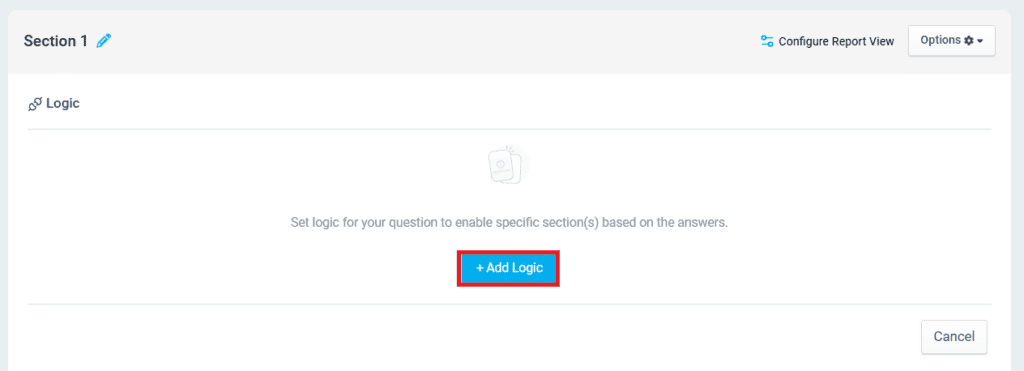
- Click on the Add Logic button
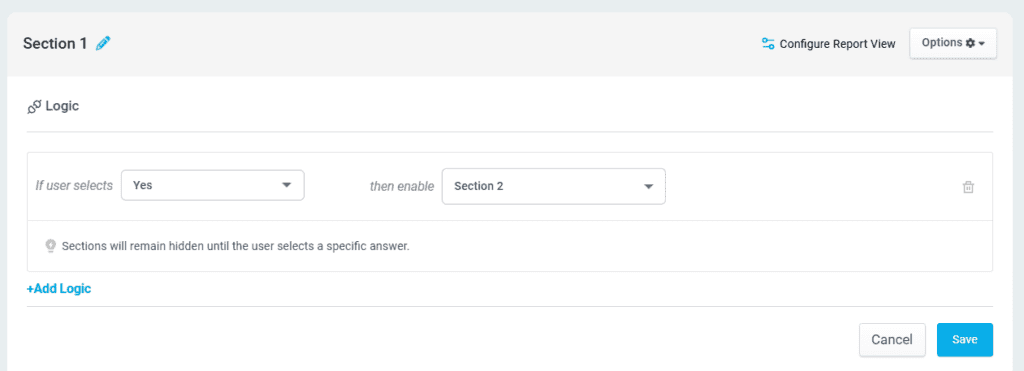
- Select the logic for the question and click Save.
Revising the Form
The forms can be revised to create another version of the existing published form with changes to the form questions.
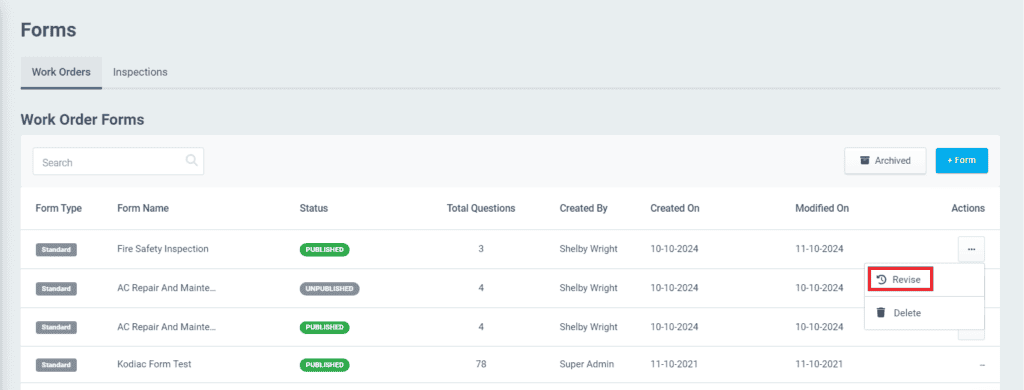
- Click on the
icon and on the Revise option.
- A confirmation message will appear, where you can click on the Yes button to revise the form.
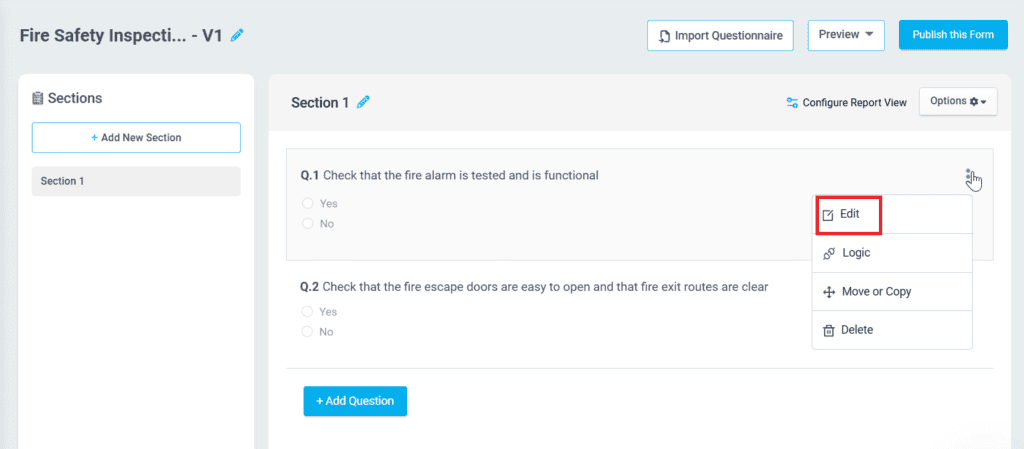
- Click the Edit button to edit the questions, options, and settings for the question.
- Click the Publish this form button to save and publish the revised form.