Configure your Business Email
Want to use your own business email ID when sending emails to customers instead of the default ReachOut email ID? Well, you can! Configure your outgoing in-app email address to your preferred business email ID, by major email providers (Gmail, Outlook, Yahoo, etc.).
You can easily manage the SMTP settings to maintain a default channel for sending outbound emails and include your company name as the Sender.
To set up your business email ID for your outgoing in-app emails to your customers,
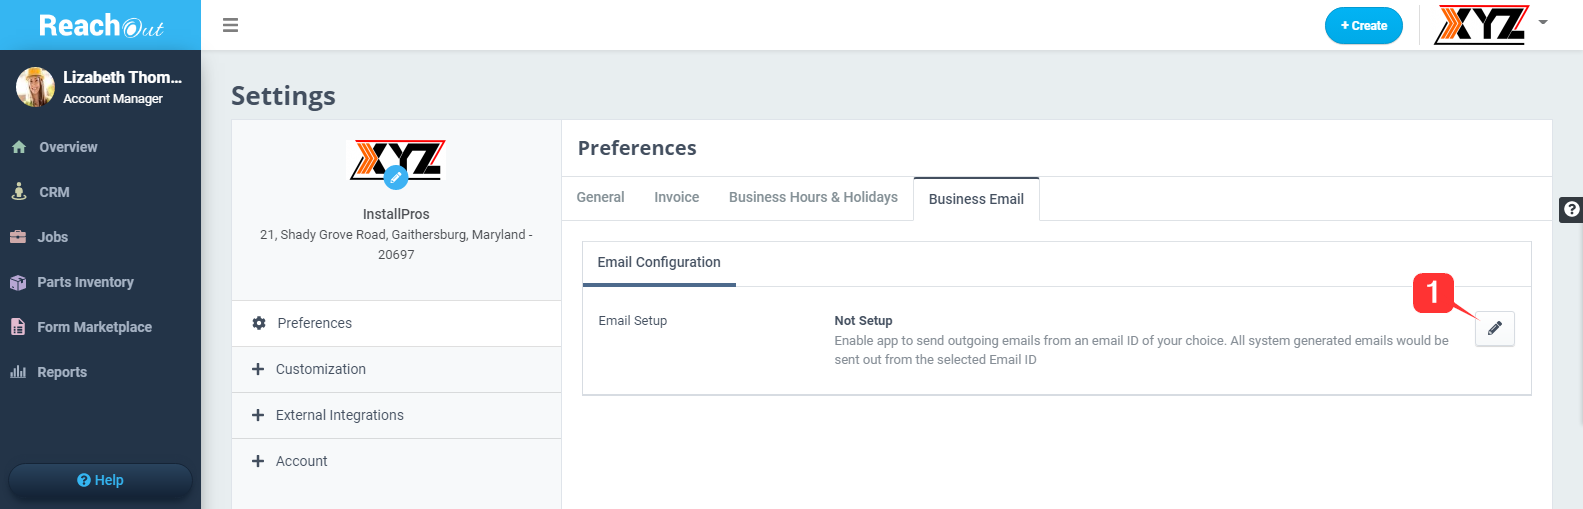
1. Go to Settings > Preferences > Business Email and then click the Edit button to start setting up your business email.
2. Under the Email Configuration tab, select your business email provider, and the remaining fields – Host, Port, Connection will auto-populate accordingly.
3. Enter the ‘User Email’, ‘Password’, and ‘Display Name’ and click on the Save icon.
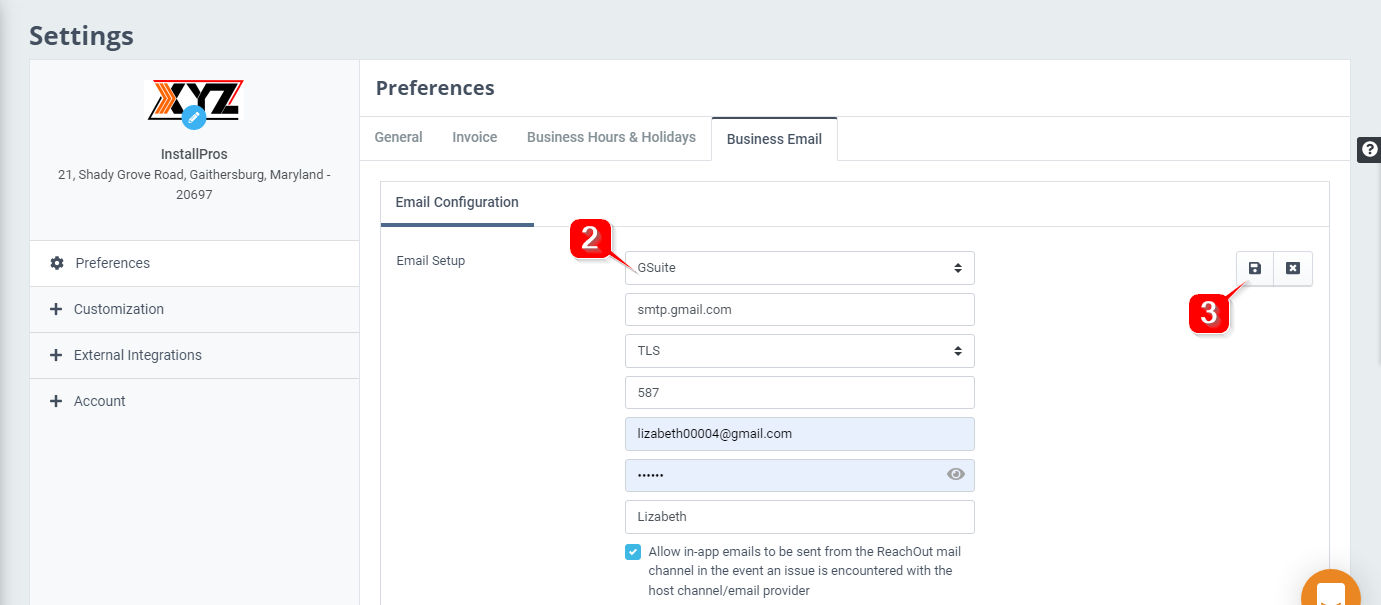
The ‘Allow in-app emails’ option will be checked off by default. This is to ensure that in the event there is an issue with your email provider channel, the in-app emails will be sent using the ReachOut email channel.
PLEASE NOTE – The SMTP setup and the verification process may vary for each email provider. Here we will walk you through how to configure your SMTP settings for the most popular email service provider(s).
Gmail
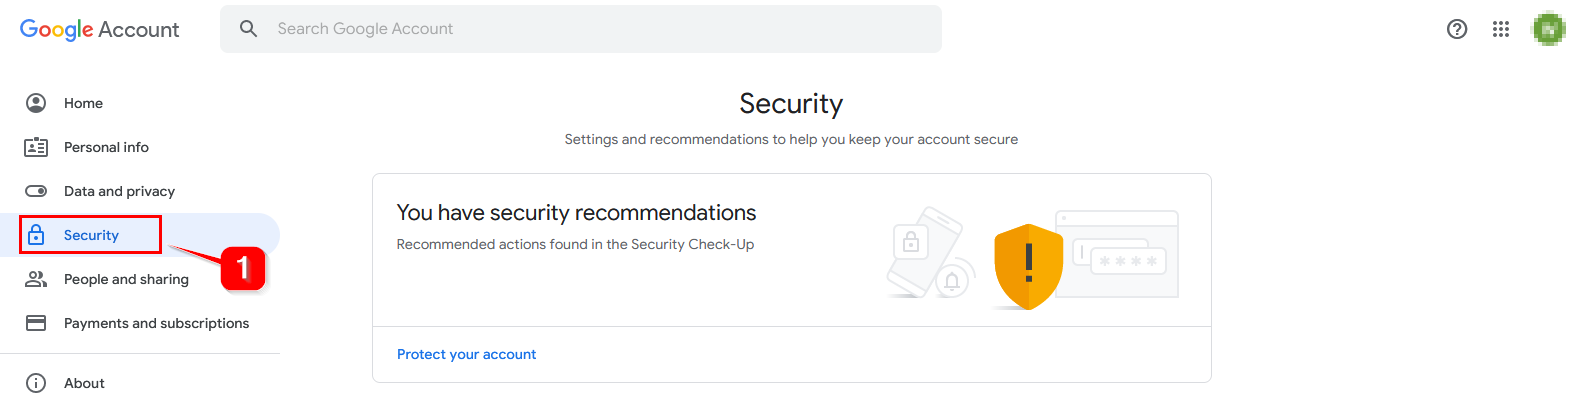
To synchronize with your Google account, you should first disable certain security privileges inside Gmail.
1. Go to the My Account section and click Security on the left navigation bar.
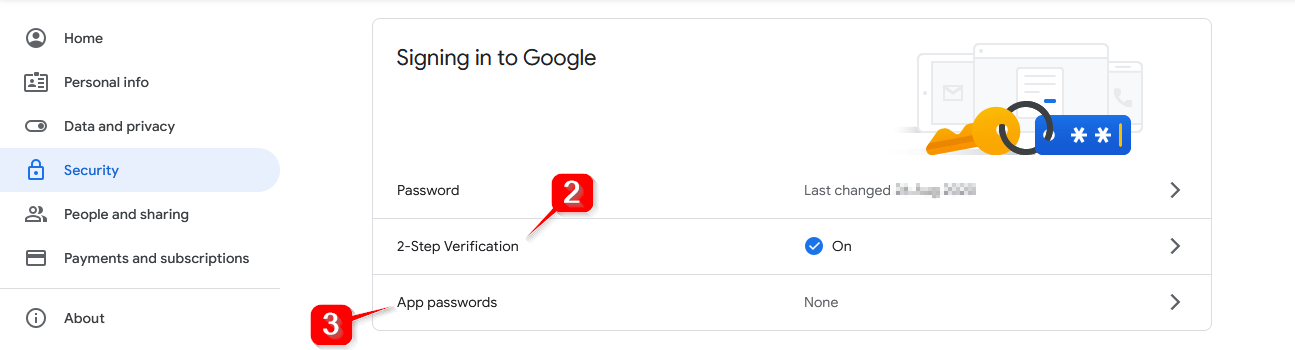
2. Enable 2-Step Verification if it’s turned off. Complete the setup as per instructions.
3. Next, you need to generate an app password. Click on App passwords, and enter your credentials for verification.
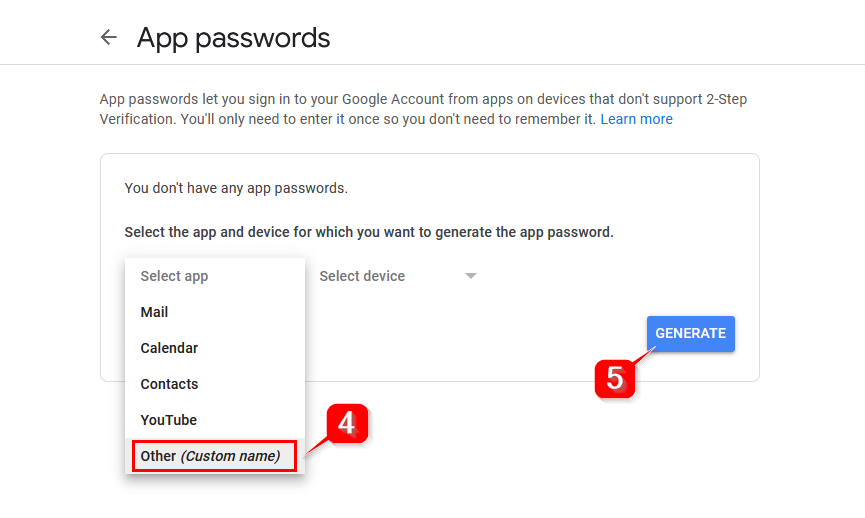
4. From the Select app dropdown, click Others and enter a custom name say ‘ReachOut’ to the app password.
5. Click Generate to get the app password.
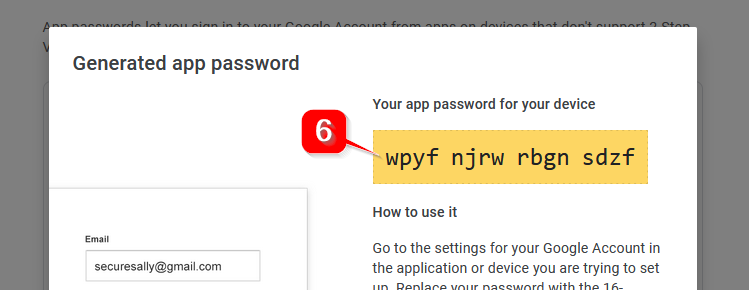
6. Copy the generated app password.
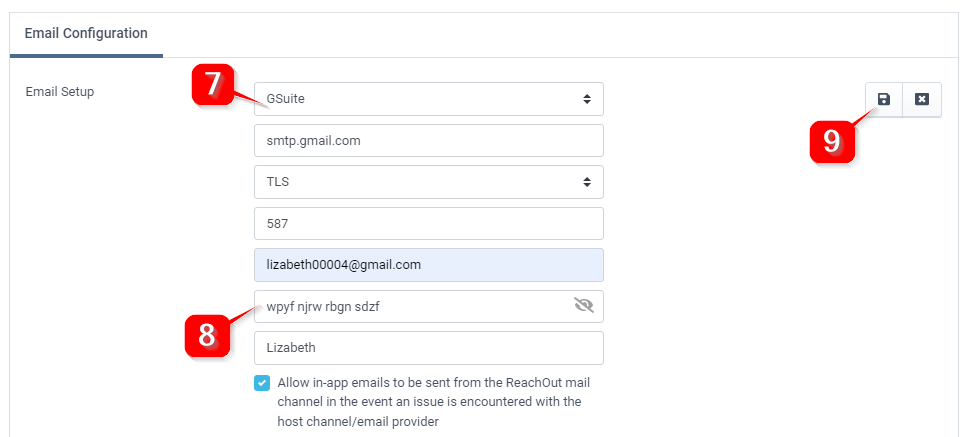
7. Next, go to the email configuration section. Select GSuite from the Service Provider drop-down in Mail Settings. The remaining fields – Host, Port, and Connection will auto-populate accordingly.
8. Enter the User Email, Generated App Password, and Display Name.
9. Click Save.
If you face any difficulties while setting up your business email, feel free to contact us at [email protected].