Customizing Ticket Settings
One of the things prior to working with tickets is customizing the ticket settings. This is something that you must do during the initial setup of your ReachOut account in order to change the default settings and customize it with the way your organization works.
There are three global settings that control Tickets.
- Status
- Events
- Categories
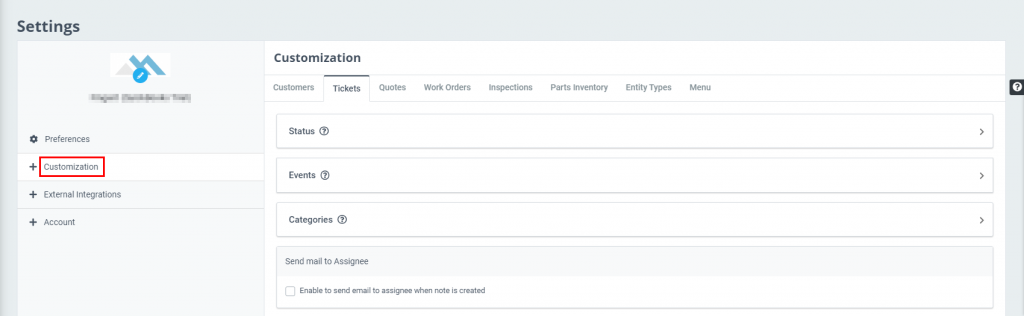
To customize any of these ticket settings, go to – Settings > Customization.
Under Customization, select the tab called Tickets. Now you are able to change any of the three settings for tickets.
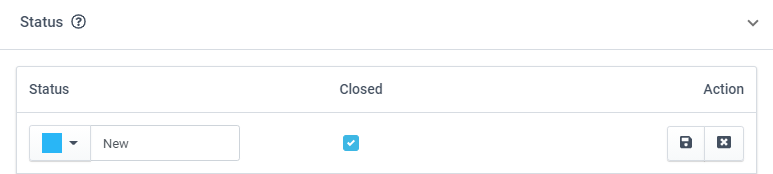
- Customizing Status
You can add multiple statuses to indicate and track the lifecycle of a created ticket.- On the page, click the section heading Status and click on + Status. Use the color selector to assign a color for each status and provide a status name in the field.
- Indicate if the status is to be treated as “Closed” by putting a checkmark in the Closed column.
- Save the change by pressing the floppy disk icon.
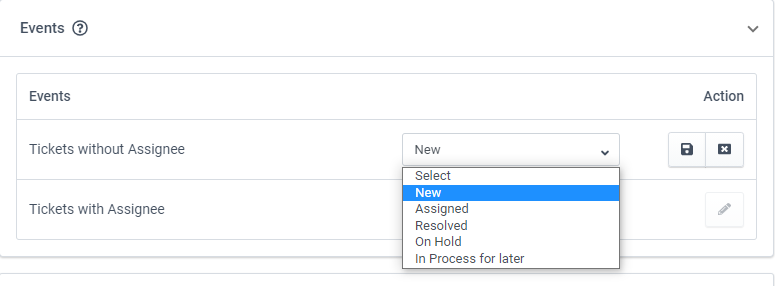
- Customizing Events
Events are used to automatically change the status of a Ticket as it is acted upon by users.- Open the Events section to see the events currently assigned.
- To associate a system event with a status, click the pencil icon for the event and select the status in the status column that is to apply.
- Save the change by clicking the floppy disk icon.
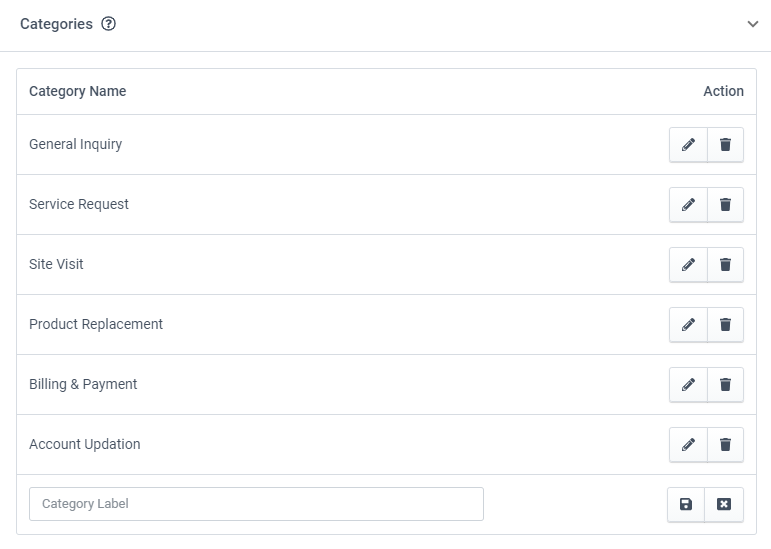
- Customizing Categories
You can create categories and name them to classify Tickets using terms that are appropriate for the way tickets are used in your organization. These categories help you sort and filter tickets in online views and in reports.
You can have as many categories as you want. For this,- Click on the Categories section of the page, to view the current category settings.
- Create new categories by clicking on + Category and enter a category label in the field.
- Save the new category label by pressing the diskette icon. Edit the category by clicking the pencil icon next to it in the list. Delete the label using the trashcan icon.