Work Order Creation
Before creating a Work Order, you should have already set up ReachOut with Custom Status Labels, Categories, Events, Work Order Attributes, and Assets. See how work order settings are configured here.
There are three ways to create a work order in ReachOut.
- You can use the Quick Create button at the top right of the interface. See the screenshot below.

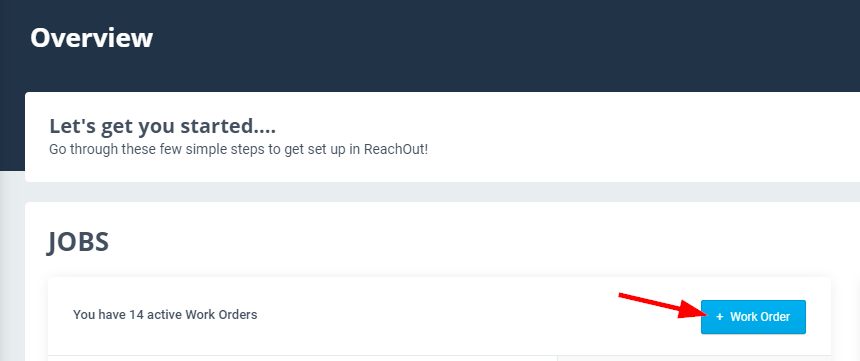
- You can add it from the Overview (start page).
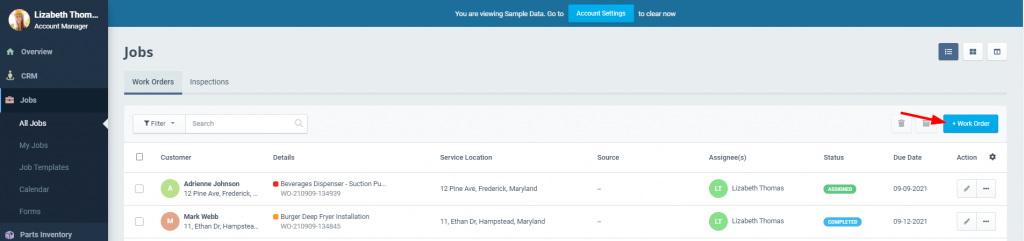
- The other way to create a work order is by going to Jobs > All Jobs > + Work Order.
Creating a Work Order
Once you choose to create a work order, you will have to add the job details in the applicable fields. Work Order Name and Duration are mandatory fields*
- Start by selecting a Customer from the dropdown.
- Assign a Source for the work order from the dropdown.
- Set a Priority and Category for the job.
- Enter a Work Order Name. Include a description & attachments.
- Select a date & time. To skip scheduling, turn on Schedule Later.
- Click Select Agent(s) field and choose agents from the list.
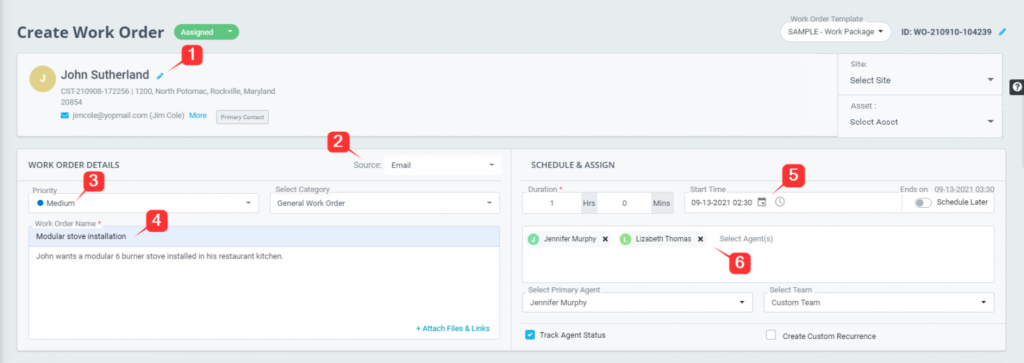
Note: The agent added first gets automatically assigned as the Primary Agent.
- Check off Track Agent Status to track the time your field agents spend on the job.
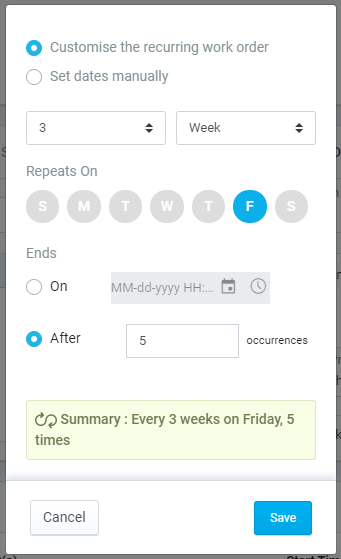
- Mark Create Custom Recurrence, to create a recurring work order that repeats at a given interval. Set the recurring settings:
- As you add agents to the work order, Task(s) will be auto-generated for each agent, under the Manage Agents Task(s) section. Task Name, Description, and the Start Time and End Time will get pre-populated as default. Click the pencil icon to edit task details.
- Or create additional tasks by clicking + Add.

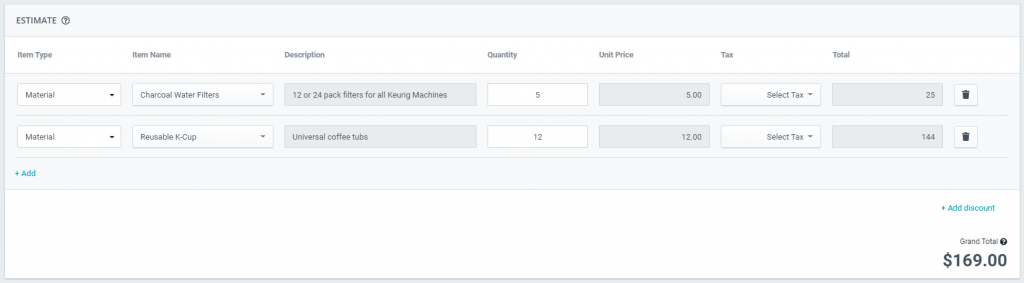
- You can tie up Estimates as a part of the Work Order (either as an optional or required element) to get a breakdown of the total costs, taxes, and discounts. Learn more about creating estimates here.
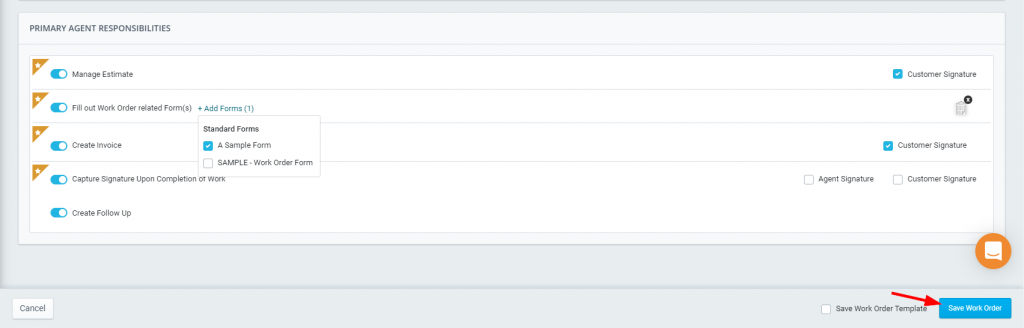
- Now, mark the duties that the Primary Agent should carry out at the site. Add Forms, if needed.
- Check off Save Work Order Template to reuse the work order steps for another job. Learn how to set up work order templates here.
- Once done, click Save Work Order.
Go to All Jobs to view your created work order and the field agents assigned for the same.